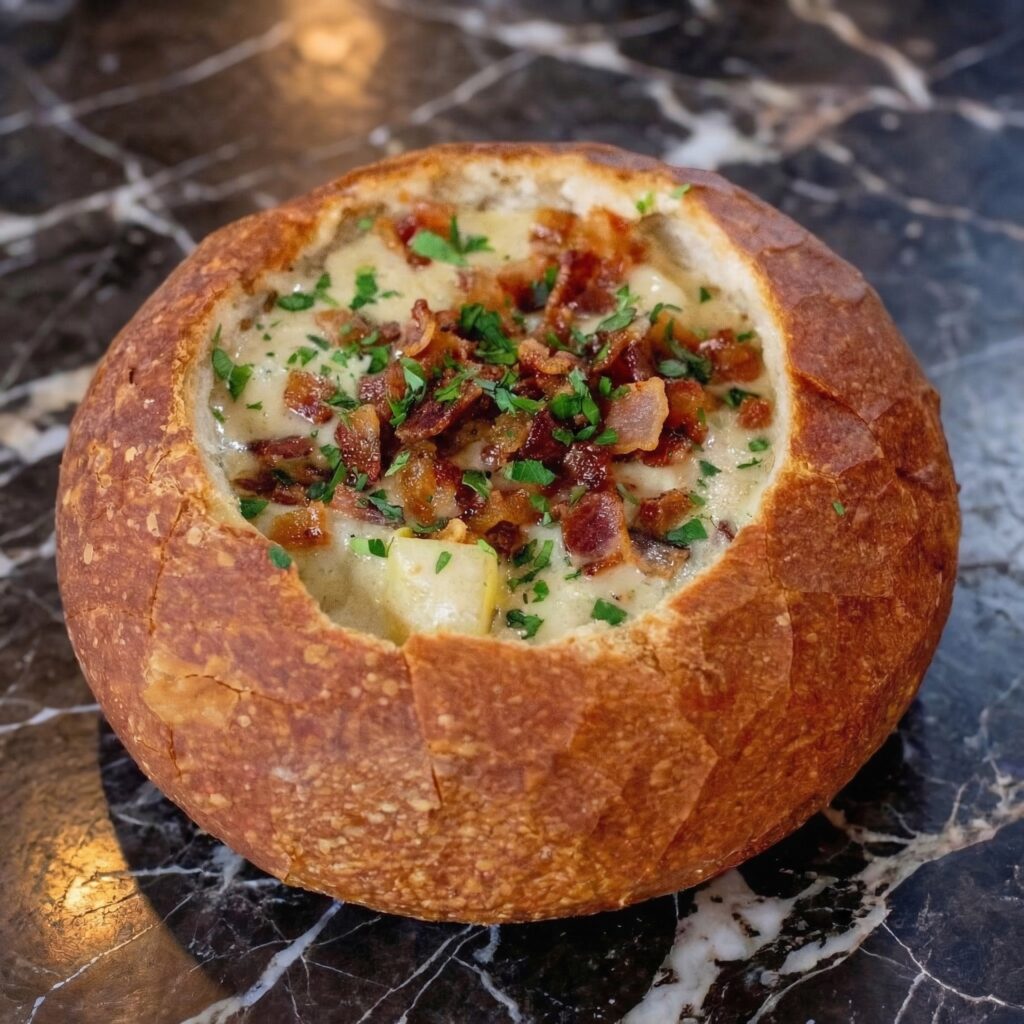
There are few things more comforting than a bowl of soup on a cold day. Now imagine that bowl is made of warm, crusty, tangy sourdough bread—golden on the outside, chewy on the inside, and sturdy enough to hold every last drop of your favorite chowder, stew, or chili.
You eat the soup, then you eat the bowl. It’s the ultimate one-two punch of comfort food, and it’s surprisingly doable at home. This recipe yields four gorgeous, bakery-worthy sourdough bowls with that signature tang, a crackling crust, and an interior that’s perfect for hollowing (or just tearing apart).
Whether you’re hosting a soup night or just want to impress yourself, these bowls are pure edible magic.
Feed Your Starter
If your starter has been in the fridge, feed it 8-12 hours before you plan to mix your dough. It should be bubbly, active, and pass the float test (a small dollop floats in water).
Mix the Dough
In a large bowl, combine the flour and water. Mix with your hands until no dry bits remain. Cover and let rest for 30-60 minutes (this is the autolyse, which starts gluten development).
Add Starter and Salt
Add the active sourdough starter and salt to the dough. Mix by pinching and folding until fully incorporated. The dough will be shaggy and slightly sticky—that’s perfect.
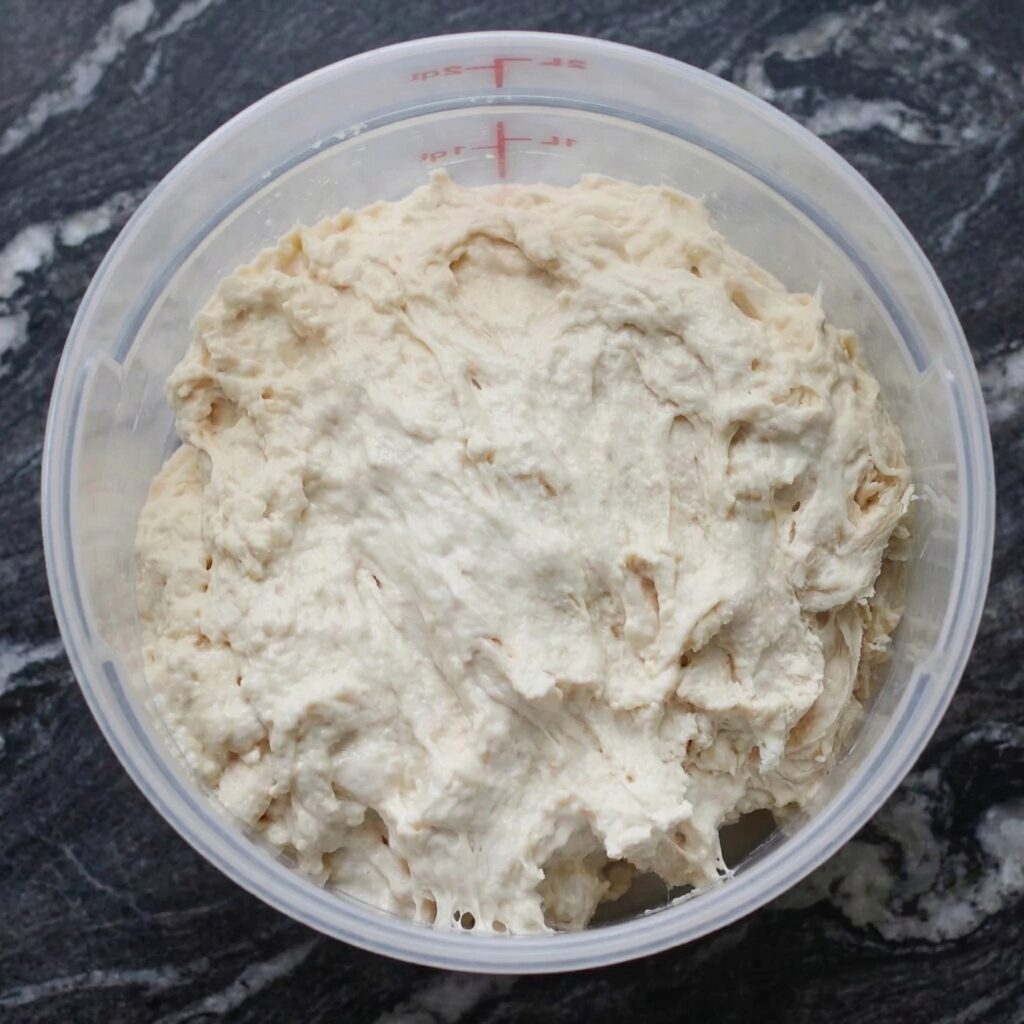
Bulk Fermentation (Series of Stretch and Folds)
Cover the bowl and let the dough rest for 30 minutes. Perform your first set of stretch and folds: wet your hand, grab one side of the dough, stretch it up, and fold it over itself. Rotate the bowl and repeat 4 times. Cover and rest. Repeat this process every 30 minutes for 2-3 hours (4-6 sets total). The dough should become smooth, elastic, and show visible bubbles.
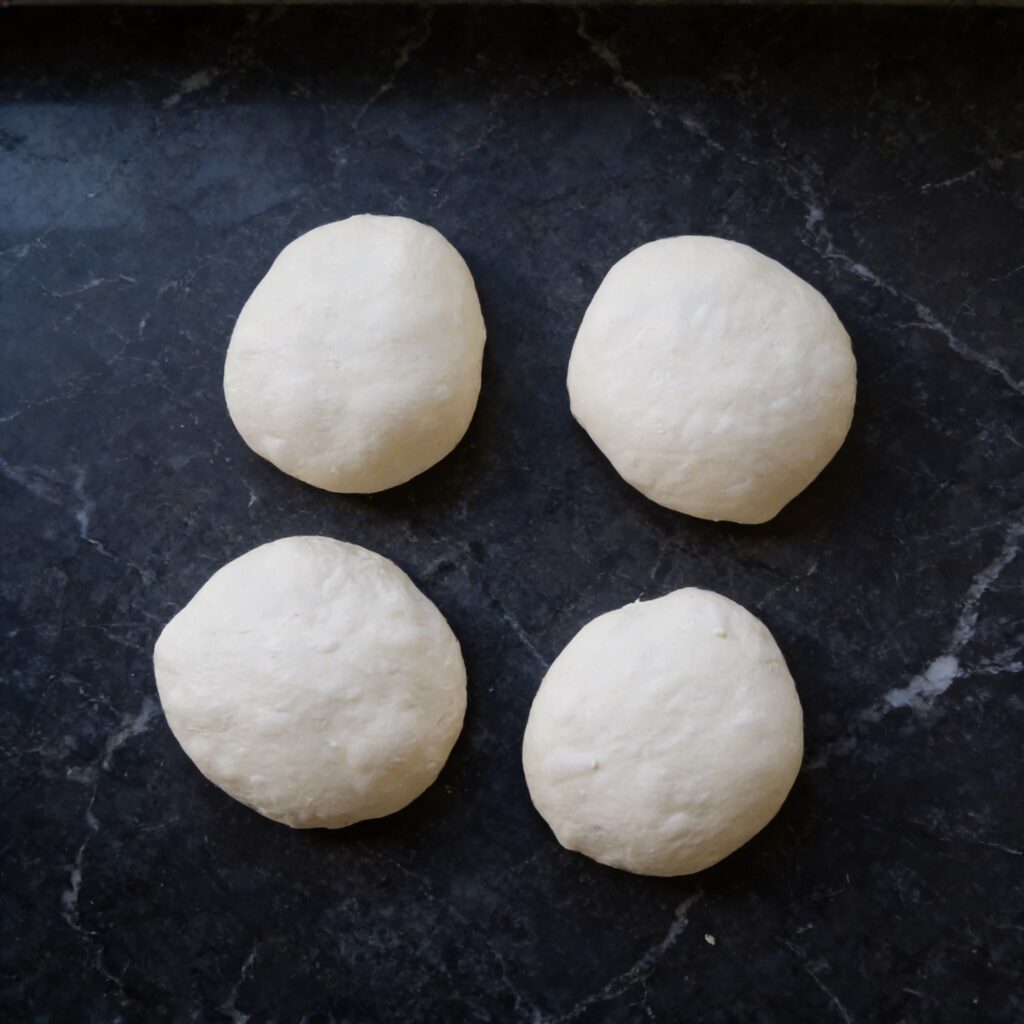
Shape into Balls
After bulk fermentation, turn the dough onto a lightly floured surface. Divide into 4 equal pieces (about 240g each). Gently shape each into a round by folding the edges into the center, then flipping and dragging the ball toward you to create tension. Let rest 20 minutes uncovered.
Final Shaping
Shape each piece again into a tight, smooth ball. Place seam-side down in floured proofing baskets or bowls lined with floured kitchen towels.
Cold Proof (Optional but Recommended)
Cover and refrigerate overnight (8-12 hours) for maximum flavor and easier handling. Or proof at room temperature for 2-3 hours until puffy.
Preheat the Oven
Place a Dutch oven or baking steel in your oven and preheat to 475°F (245°C) for at least 45 minutes. If using a baking steel, have a heavy pan for steam ready.
Score and Bake
Carefully remove one dough ball from the fridge. Flip onto parchment paper, seam-side down. Dust with flour and score the top with a sharp blade (a simple X or crosshatch).
Transfer to the Dutch oven or baking steel. If using a Dutch oven, cover and bake for 20 minutes, then remove lid and bake 15-20 minutes until deep golden brown. If using a baking steel, add ice cubes to the steam pan and bake 20 minutes with steam, then 15-20 minutes without.
Cool Completely
Transfer to a wire rack and let cool completely—at least 2 hours. This step is crucial for texture and for the next hollowing step.
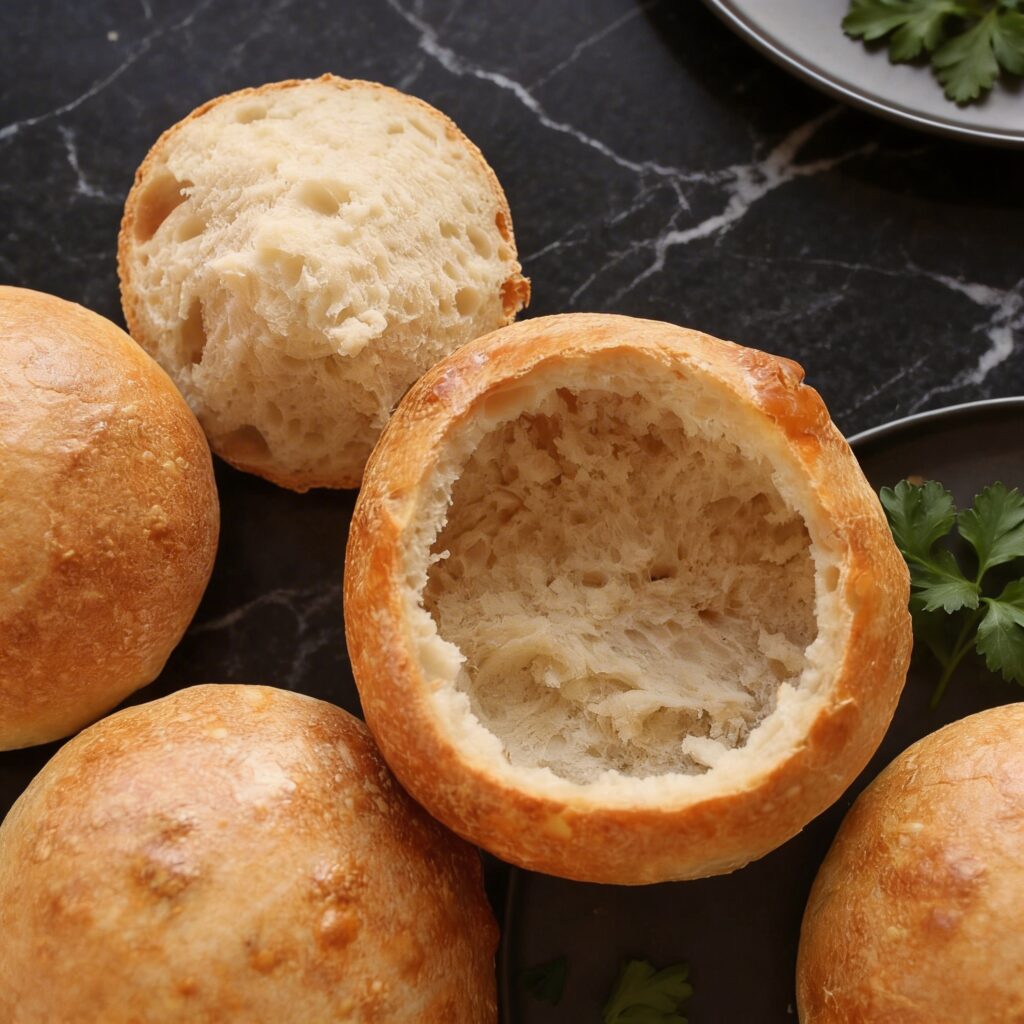
Hollow the Bowls
Once completely cool, use a serrated knife to cut a circle in the top of each loaf, about ½ inch from the edge. Remove the top and set aside. Gently pull out the soft interior bread, leaving a ½-inch thick shell. Reserve the removed bread for dipping.
The Secret Step—Bake Again
Place the hollowed bowls and their tops on a baking sheet. Bake at 350°F (175°C) for 5-10 minutes to dry out the interior. This creates that waterproof barrier!
Fill and Serve
Let cool slightly, then fill with hot soup, chili, or stew. Serve immediately with the reserved bread for dipping and the top as a “lid” or on the side.
Pro-Tips for Perfect Sourdough Bowls
- Use a Strong Starter: A bubbly, active starter is non-negotiable. Feed it 8-12 hours before mixing, and make sure it doubles in volume.
- Don’t Skip the Autolyse: That initial flour-water rest gives the gluten a head start, making the dough easier to work with and improving texture.
- Cold Proof for Flavor: An overnight rest in the fridge develops deeper sourdough tang and makes scoring easier.
- Cool Completely Before Hollowing: Warm bread is gummy and will tear. Patience gives you clean, sturdy bowls.
- The Second Bake Is Magic: Never skip drying out the interior—it’s the difference between a bowl that lasts 5 minutes and one that lasts 45.
- Match Soup to Bowl: Thicker soups like chowder, chili, broccoli cheddar, or potato soup work best. Very brothy soups may soak through faster. These Ultimate Sourdough Bread Bowls turn soup night into an event.
They’re edible, they’re beautiful, and they’re absolutely worth every minute of the process.