Ultimate Homemade Pizza: From Dough to Wood-Fired Perfection

Introduction: The Friday Night Game Changer
Picture this: it's Friday evening, the kids are clamoring for pizza, and you're staring at your phone debating between overpriced delivery options that never quite live up to expectations. But what if I told you that the most incredible pizza you've ever tasted could come from your own kitchen? Imagine pulling a perfectly golden, bubbling pizza from your oven – crispy crust with those coveted charred spots, melted cheese stretching in long ribbons, and that intoxicating aroma filling your home. This isn't just another pizza recipe; this is your roadmap to creating pizzeria-quality pies that will have your family convinced you've secretly been apprenticing in Naples. With simple ingredients, proper technique, and a few insider secrets, you'll transform pizza night from a mundane takeout routine into the most anticipated evening of your week.
Great pizza is a beautiful balance of contrasts: a crust that's crispy on the bottom yet chewy inside, sauce that's bright and flavorful without overwhelming the other elements, and cheese that melts into perfect golden pools. The magic happens not just in quality ingredients, but in understanding the science behind fermentation, heat distribution, and timing. So preheat your oven, dust off your apron, and let's dive into creating pizza that rivals the best pizzerias – right in your own kitchen.
Ingredients: Building Blocks of Pizza Perfection
For the Pizza Dough (Makes 3-4 12" pizzas):
• 500g (4 cups) bread flour or 00 flour
• 325ml (1⅓ cups) lukewarm water
• 2 teaspoons (7g) active dry yeast
• 2 tablespoons extra virgin olive oil
• 2 teaspoons fine sea salt
• 1 teaspoon sugar
For the Pizza Sauce:
• 1 can (28oz) San Marzano tomatoes, crushed by hand
• 3 cloves garlic, minced
• 2 tablespoons extra virgin olive oil
• 1 teaspoon dried oregano
• 1 teaspoon salt
• ½ teaspoon freshly ground black pepper
• Fresh basil leaves
For Assembly (Per Pizza):
• ¾ cup pizza sauce
• 6oz fresh mozzarella, torn into chunks
• 2 tablespoons freshly grated Parmigiano-Reggiano
• Extra virgin olive oil for drizzling
• Fresh basil leaves
• Semolina or cornmeal for dusting
Pro Ingredient Tips: Use bread flour for better gluten development, resulting in a chewier, more authentic crust. San Marzano tomatoes are worth the investment – their sweet, low-acid flavor is perfect for pizza. Fresh mozzarella di bufala creates the best melting quality, but high-quality cow's milk mozzarella works beautifully too.
Equipment Needed
• Large mixing bowl
• Kitchen scale (highly recommended)
• Pizza stone or steel (essential for crispy crust)
• Pizza peel or large cutting board
• Rolling pin (optional)
• Large saucepan
• Fine mesh strainer
• Clean kitchen towels
• Plastic wrap or damp towel
Timing: Total time is about 4-24 hours, including dough fermentation time. Active preparation is approximately 45 minutes. The recipe makes 3-4 pizzas, serving 6-8 people depending on appetite and side dishes.
Step 1: Creating the Perfect Pizza Dough
In a small bowl, combine lukewarm water (around 105°F), sugar, and yeast. Stir gently and let bloom for 5-10 minutes until foamy and fragrant. If the yeast doesn't foam, it's dead and needs to be replaced. In a large mixing bowl, combine flour and salt, creating a well in the center. Pour the activated yeast mixture and olive oil into the well.
Using a wooden spoon or your hands, gradually incorporate the flour into the liquid, mixing until a shaggy dough forms. Turn the dough onto a lightly floured surface and knead for 8-10 minutes until smooth, elastic, and slightly tacky. The dough should spring back when poked gently. Place in an oiled bowl, cover with plastic wrap or a damp towel, and let rise in a warm place for 1-2 hours until doubled in size. For even better flavor, refrigerate the dough for 24-72 hours for slow fermentation, bringing to room temperature 1 hour before shaping. This extended fermentation develops complex flavors and improves digestibility.
Step 2: Crafting the Ultimate Pizza Sauce
While the dough rises, prepare your sauce. Heat olive oil in a large saucepan over medium heat. Add minced garlic and sauté for 30 seconds until fragrant but not browned. Add the crushed tomatoes, oregano, salt, and pepper. Simmer for 15-20 minutes, stirring occasionally, until the sauce thickens and reduces slightly. The sauce should coat the back of a spoon but not be overly thick.
Remove from heat and stir in fresh basil leaves. Let cool completely before using – warm sauce will make your dough soggy. Strain the sauce through a fine mesh strainer if you prefer a completely smooth texture, though many prefer the rustic texture of unstrained sauce. This recipe makes enough sauce for all your pizzas with some leftover for pasta or future pizza nights. Properly made sauce can be refrigerated for up to 1 week or frozen for up to 3 months.
Step 3: Preparing Your Oven and Equipment
Place your pizza stone or steel on the middle rack of your oven and preheat to the highest temperature setting (usually 500-550°F) for at least 45 minutes. This extended preheating ensures the stone reaches maximum temperature for optimal crust development. If using a pizza steel, it may heat faster but benefits from the same preheating time for consistency.
Prepare your workspace by dusting your pizza peel or large cutting board generously with semolina or cornmeal – this acts like ball bearings, helping the pizza slide easily. Have all your toppings ready and at room temperature. Cold toppings can cool the dough and prevent proper cooking. Tear your mozzarella into irregular chunks rather than slicing – this creates better melting patterns and prevents the cheese from becoming greasy. Keep everything within arm's reach because once you start assembling, timing becomes crucial.
Step 4: Shaping and Stretching the Dough
Divide your risen dough into 3-4 equal portions (about 275g each for 12" pizzas). Shape each portion into a tight ball and let rest on a floured surface for 15 minutes to relax the gluten. Working with one ball at a time, flour your hands and the dough surface generously. Starting from the center, gently press the dough outward, leaving a slightly thicker border for the crust.
For hand stretching, lift the dough and use gravity to help stretch it, rotating as you go. The traditional method of spinning dough over your head looks impressive but isn't necessary – gentle hand stretching works perfectly. Aim for about 12 inches in diameter and relatively even thickness, though slight irregularities add character. If the dough springs back excessively, let it rest for another 10 minutes. Avoid using a rolling pin if possible, as it removes air bubbles that create texture, but if you must roll, do so gently. Transfer the shaped dough immediately to your prepared peel.
Step 5: Assembly and the Art of Topping
Work quickly once your dough is on the peel – you have about 1-2 minutes before it may stick. Spread sauce evenly using the back of a spoon, leaving a ¾-inch border for the crust. Use less sauce than you think you need – too much creates a soggy pizza. Distribute torn mozzarella chunks evenly, avoiding the temptation to overload. Too much cheese prevents proper browning and creates a greasy result.
Sprinkle grated Parmigiano-Reggiano over the mozzarella and drizzle lightly with olive oil. Give your peel a gentle shake to ensure the pizza moves freely. If it sticks anywhere, lift that section and add more semolina. Fresh basil should be added after baking to preserve its bright flavor and prevent burning. Remember, less is more with pizza toppings – each element should be able to shine through without overwhelming the others.
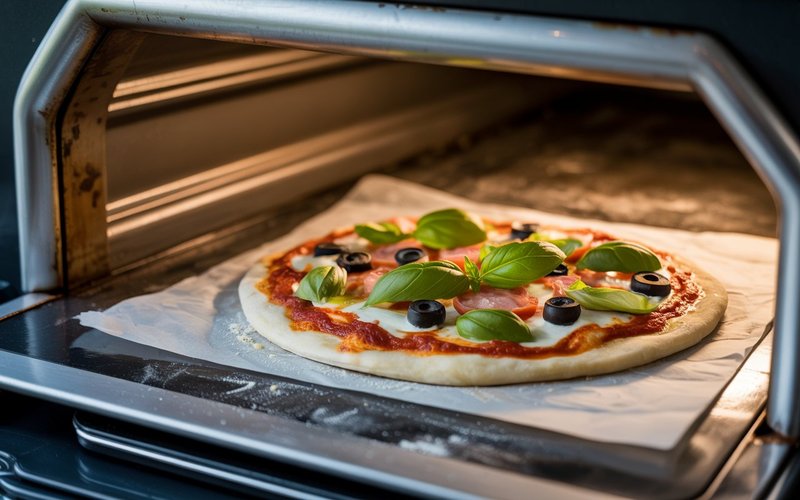
Step 6: Baking to Golden Perfection
With confidence, slide the pizza onto your preheated stone using a quick, decisive motion – pull the peel toward you while the pizza stays put. Bake for 8-12 minutes, depending on your oven's capabilities and desired doneness. Look for a golden-brown crust with some charred spots, bubbling cheese, and sauce that appears set rather than watery.
Rotate the pizza halfway through baking if your oven has hot spots. The bottom should be crispy and golden when lifted with a spatula. If the top is browning too quickly but the bottom isn't done, move the pizza to a lower rack for the final few minutes. Remove with the peel or large spatula, immediately garnish with fresh basil leaves, and let cool for 2-3 minutes before cutting. This brief rest allows the cheese to set slightly, preventing it from sliding off when cut. Repeat with remaining dough balls, reheating the stone between pizzas if necessary.
Pro Tips for Pizza Mastery
Temperature is King: The hottest possible oven temperature creates the best crust texture and prevents soggy bottoms. If your oven goes higher than 550°F, use it! Some home cooks successfully use the broiler for the final minute to achieve extra charring.
Less is More: Resist overloading with toppings. Professional pizzas use surprisingly minimal amounts of sauce and cheese. Each ingredient should complement, not compete with, the others. A heavy hand with toppings leads to soggy, unbalanced pizza.
The Peel Technique: Practice sliding pizza onto the stone with confidence. Hesitation often leads to disasters. If you're nervous, practice with just dough (no toppings) until you master the motion. A quick, decisive slide works better than slow, tentative movements.
Sauce Consistency: Your sauce should be thick enough not to make the dough soggy but not so thick it doesn't spread easily. If too thin, simmer longer. If too thick, add a splash of pasta water or tomato juice.
Variations and Creative Toppings
Once you've mastered the classic Margherita, explore endless variations. For a white pizza, skip the tomato sauce and use ricotta mixed with garlic and herbs as your base. Caramelized onions, roasted vegetables, and quality cured meats like prosciutto or pancetta make excellent additions. Seasonal variations keep pizza exciting – try butternut squash and sage in fall, or fresh corn and basil in summer.
Remember the golden rule: add delicate ingredients like arugula, prosciutto, or fresh herbs after baking. Heartier vegetables like bell peppers or mushrooms should be pre-cooked slightly to remove excess moisture. When experimenting, change only one element at a time so you can evaluate what works and what doesn't. Document successful combinations for future reference, and don't be afraid to draw inspiration from your favorite pizzerias while making the recipes your own.
Storage and Make-Ahead Strategies
Pizza dough actually improves with time, making it perfect for meal planning. Refrigerate portions of dough in oiled containers for up to 5 days, or freeze for up to 3 months. Frozen dough should be thawed overnight in the refrigerator and brought to room temperature before shaping. Pizza sauce keeps refrigerated for up to 1 week and freezes beautifully for up to 6 months.
For busy weeknights, prepare dough and sauce on weekends. You can even pre-shape pizzas, place on parchment-lined baking sheets, cover tightly, and refrigerate for up to 24 hours before topping and baking. Leftover pizza reheats best in a skillet over medium heat with a lid – this reheats the bottom while melting the cheese, far superior to microwave reheating. Cold pizza, however, has its own devoted following and makes an excellent breakfast with coffee.
Conclusion: Welcome to Your New Pizza Obsession
Congratulations! You've just unlocked the secrets to creating exceptional homemade pizza that rivals the best pizzerias. The satisfaction of pulling a perfectly golden, bubbling pizza from your own oven is unmatched – the aroma, the anticipation, and that first bite of crispy-yet-chewy perfection. You've learned not just a recipe, but a set of techniques that will serve you for years of delicious pizza nights.
Don't stop here – let this be the beginning of your pizza journey. Experiment with different flour types, try overnight fermentation, explore regional Italian styles, or create signature combinations that become your family's favorites. Share your creations with friends and family, teach your kids the joy of stretching dough, and make pizza night a celebration rather than just a meal. Most importantly, embrace the imperfections – slightly irregular shapes and rustic charm are signs of authentic, handmade pizza. Now fire up that oven, dust your peel with semolina, and start creating pizza memories that will last a lifetime. Buona pizza!