Elevate your pizza night with this exceptional Sourdough Pizza Crust. A slow, cold fermentation with your sourdough starter develops deep, tangy flavor and creates a crust with the ideal balance of a crisp, blistered exterior and a tender, chewy interior.
This dough is versatile, forgiving, and bakes up into a professional-quality crust that’s far superior to any quick-rise yeast dough.
The Science of Flavor & Texture Development
The magic of sourdough pizza crust lies in long, cold fermentation. The wild yeast and bacteria in your starter work slowly over 24-72 hours, producing organic acids (like lactic and acetic acid) that give the dough its characteristic tang and strengthen the gluten network.
This extended fermentation also breaks down complex carbohydrates and proteins, making the crust more digestible and creating deeper flavor compounds. The cold proof in the refrigerator slows the rise, allowing flavor to develop without over-proofing.
When baked at high heat, the steam from the hydrated dough and the rapid spring from the strong gluten create the signature airy, open crumb and crisp, charred edges of artisan pizza.
Instructions
Mix the Dough (Day 1 – Morning/Afternoon)
In a large bowl, combine the warm water and active sourdough starter. Whisk until the starter is mostly dissolved. Add the bread flour and salt. Mix with a spatula or your hands until no dry flour remains. The dough will be shaggy and sticky. Cover and let rest (autolyse) for 30 minutes.
Knead & Bulk Ferment
After resting, add the olive oil if using. Turn the dough out onto a lightly floured surface and knead for 5-7 minutes, or perform 4-5 sets of stretch and folds in the bowl over 1.5 hours, until smooth and elastic. Place in a clean, lightly oiled bowl, cover tightly, and let rise at room temperature for 4-6 hours, until increased by about 50% (not doubled).
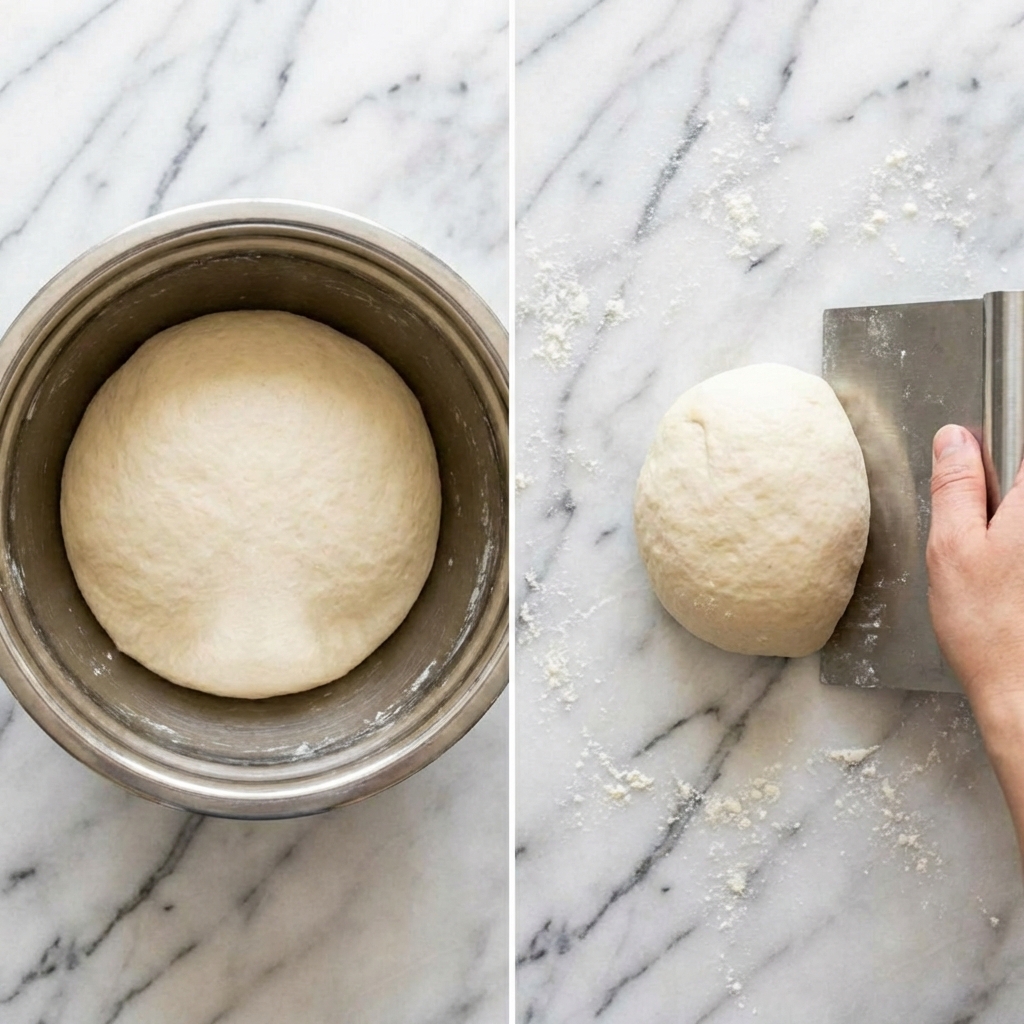
Divide & Cold Proof
Gently turn the dough out onto a work surface. Divide into two equal pieces (about 465g each). Shape each into a tight ball by folding the edges under. Place each ball seam-side down in a separate, lightly oiled container or bowl. Cover tightly and refrigerate for 24-72 hours. This cold fermentation is where the flavor develops.
Bring to Room Temperature (Baking Day)
Remove the dough balls from the refrigerator 3-4 hours before you plan to bake. Let them sit covered at room temperature to warm and become pliable. They should look puffy and relaxed.

Shape the Crusts
Preheat your oven with a pizza stone or steel to its highest temperature (500-550°F / 260-290°C) for at least 1 hour. On a surface dusted with semolina or flour, gently press one dough ball into a disc.
Using your fingers, press from the center outward, leaving a thicker border for the crust. Then, using your knuckles or carefully stretching over your fists, gently stretch the dough into a 12-inch round. Work gently to avoid tearing. Transfer the shaped dough to a semolina-dusted pizza peel or inverted baking sheet.
Top & Bake
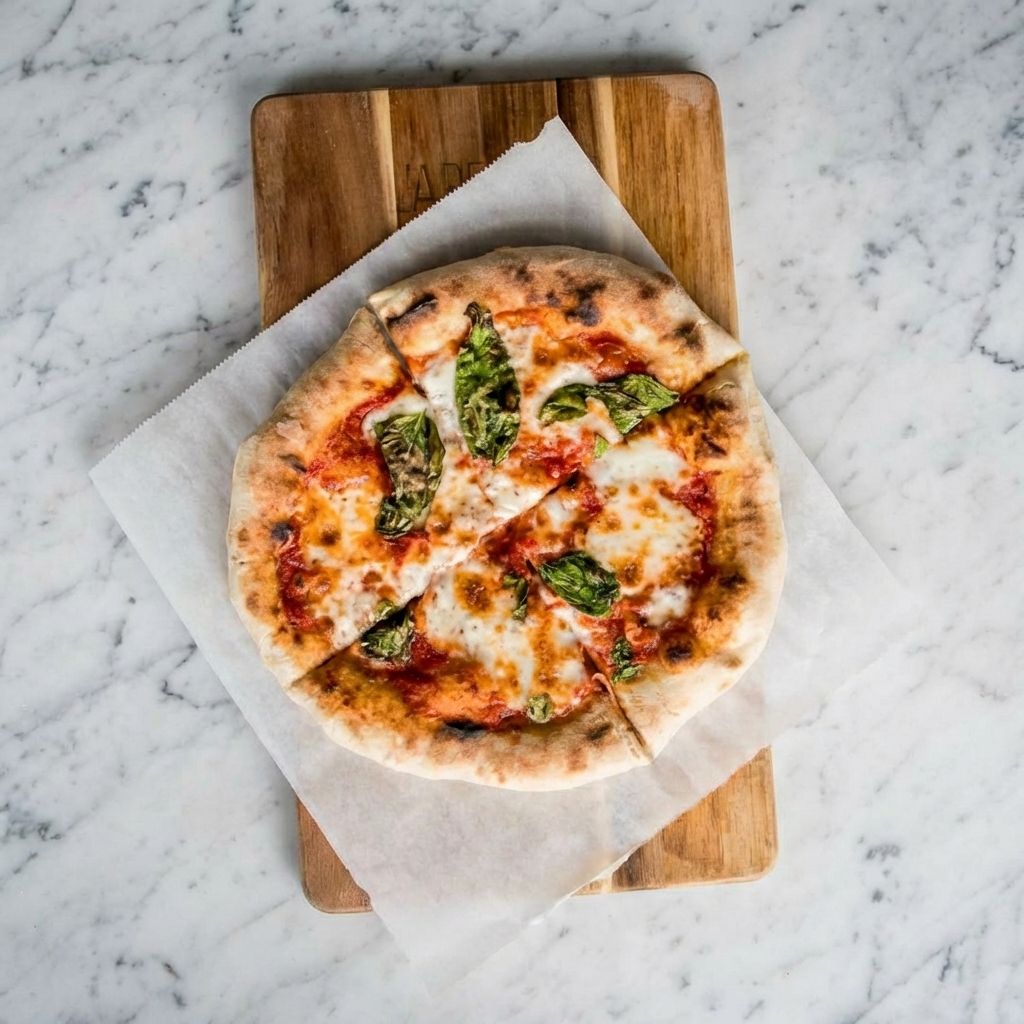
Quickly add your desired sauce and toppings, keeping them light. Shake the peel gently to ensure the dough isn’t sticking, then slide it onto the preheated stone. Bake for 6-10 minutes, until the crust is puffed, deeply spotted with brown, and the cheese is melted and bubbling.
Cool & Serve
Use the peel to remove the pizza from the oven. Let cool on a wire rack for 2-3 minutes to let the crust crisp up, then slice and serve immediately.
Pro-Tips for Pizza Perfection
- Active Starter is Crucial: Your starter should be at peak activity (bubbly, doubled) when used for maximum rise.
- Weigh Your Ingredients: For consistent dough, a kitchen scale is essential.
- Don’t Skip the Cold Proof: The 24-72 hour cold ferment is non-negotiable for the best flavor and texture.
- High Heat is Key: Preheat your oven and baking surface for a full hour to mimic a pizza oven’s intense heat.
- Keep Toppings Light: Overloading with wet toppings will steam the crust and make it soggy.
- Use Semolina on the Peel: Semolina acts like ball bearings, helping the dough slide off the peel easily.
- Work Gently When Shaping: Preserve those gas bubbles in the crust edge for an airy cornicione. If the dough resists, let it rest for 5 minutes before continuing.
- Freeze for Later: After the cold proof, dough balls can be wrapped tightly and frozen for up to 3 months. Thaw in the refrigerator overnight, then bring to room temperature before shaping.
This Sourdough Pizza Crust is a game-changer for home pizza making.