Poke cake is the genius, no-fuss dessert that promises maximum flavor with minimal effort. The concept is brilliantly simple: bake a cake, poke holes all over the top while it’s still warm, and then pour a liquid filling—like Jell-O, pudding, or sweetened condensed milk—over it.
The filling seeps into every nook and cranny, making the cake unbelievably moist and infusing it with flavor from the inside out. Topped with a layer of whipped topping and your favorite garnishes, it’s a cool, refreshing, and always crowd-pleasing treat that’s perfect for potlucks, birthdays, or a simple weeknight dessert.
The Magic of the Poke: How It Creates Ultimate Moistness
The entire identity of a poke cake hinges on the absorption technique. When the cake is warm and fresh from the oven, its structure is still flexible. Poking holes with the handle of a wooden spoon or a similar tool creates channels for the liquid filling to travel deep into the cake.
Using a warm cake is crucial because the heat helps draw the liquid downward through capillary action. The filling then sets as the cake cools, locking in that moisture and flavor. Common fillings include prepared Jell-O (which gives color and a fruity, jiggly texture), instant pudding (which creates a creamy, custard-like interior), or sweetened condensed milk (for an ultra-rich, caramel-like sweetness).
The cake essentially frosts itself from the inside, resulting in a dessert that stays moist for days and requires only a simple topping to finish.
Instructions
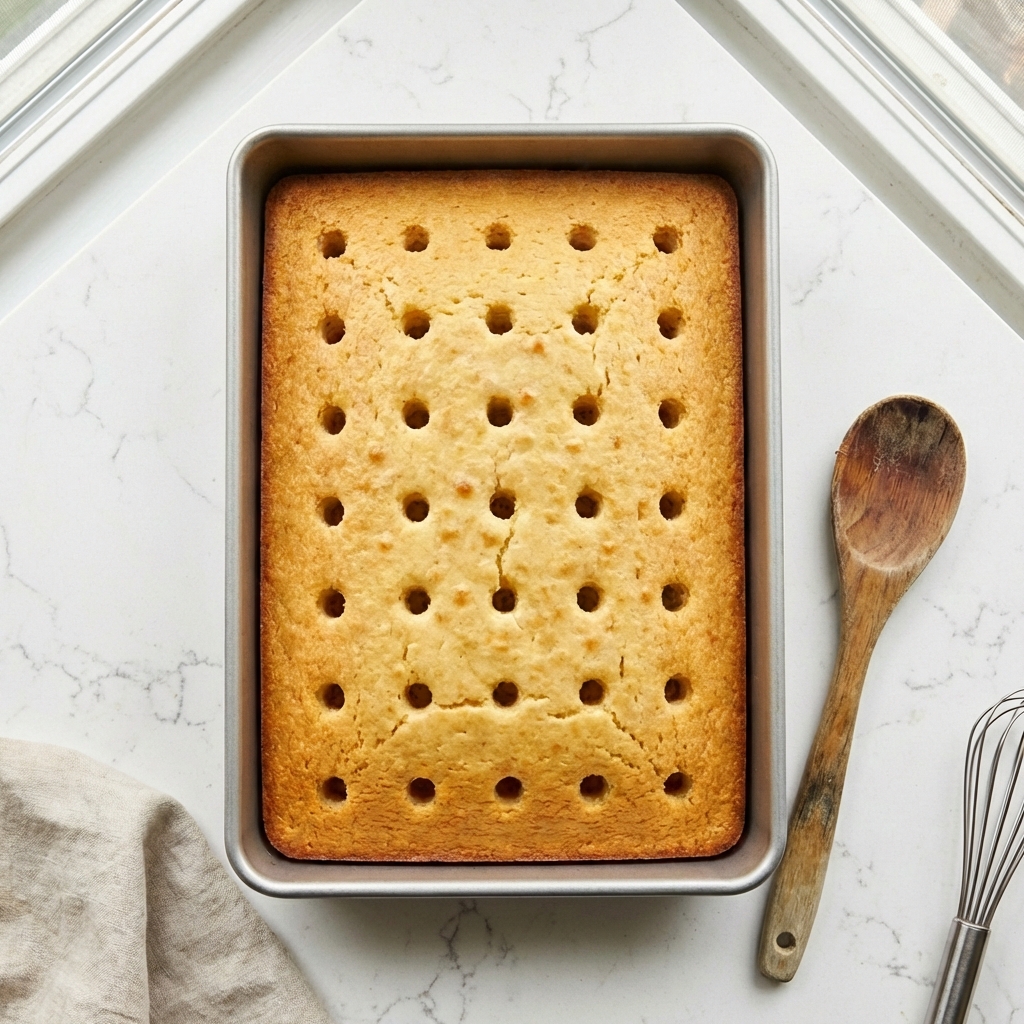
The Baked & Poked Cake (Result of Baking & Poking)
Preheat oven and prepare cake mix according to package directions for a 9×13-inch pan. Bake as directed and let cool in the pan on a wire rack for 20 minutes, until just warm (not hot).
Using the round handle of a wooden spoon or a large straw, poke holes all over the top of the cake, about 1-inch apart, going most of the way down to the bottom of the pan.
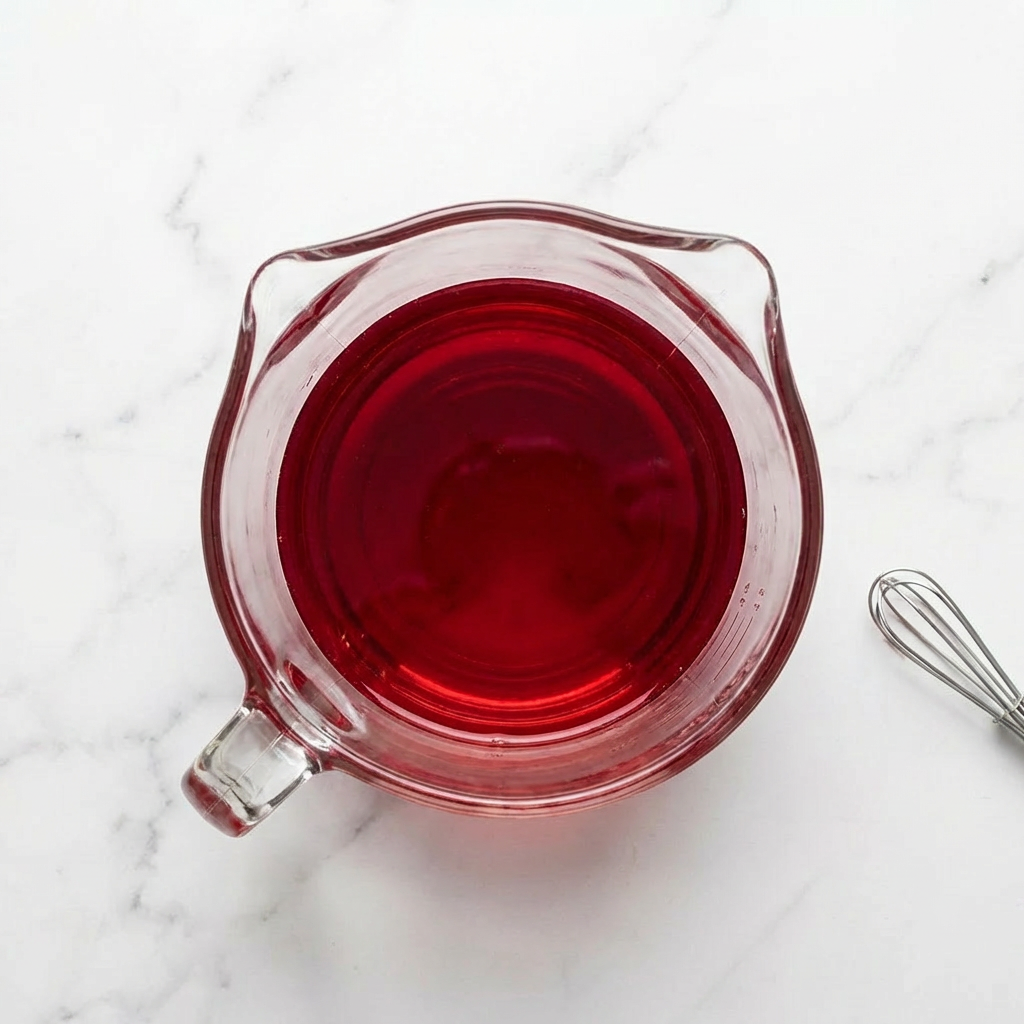
The Prepared Poke Filling (Result of Filling Prep)
While cake is baking/cooling, prepare your chosen filling. For Jell-O: dissolve gelatin in boiling water, then stir in cold water. For Pudding: whisk pudding mix and cold milk for 2 minutes until thick. For Coconut: whisk condensed milk and coconut milk until smooth.
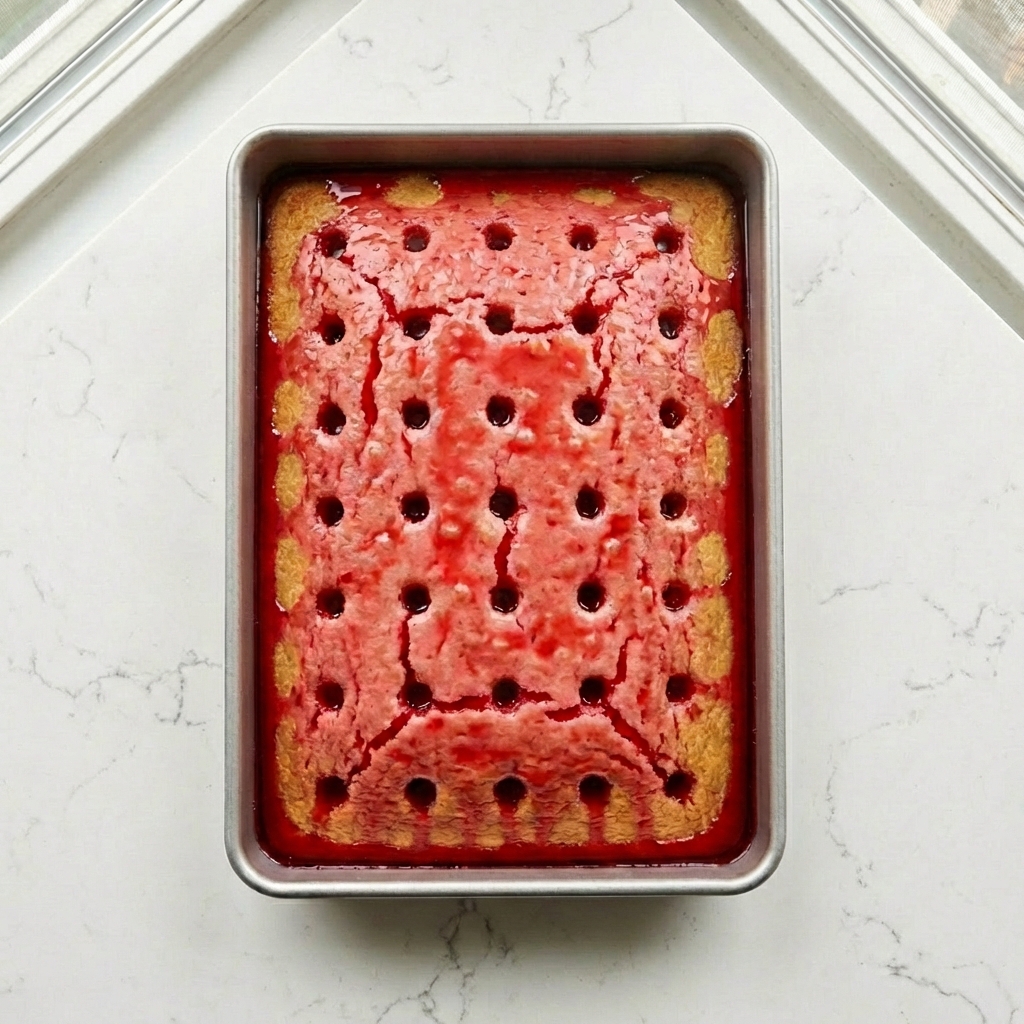
The Cake After Adding Filling (Result of Pouring)
Slowly and evenly pour your prepared filling over the warm, poked cake. Use a spatula to gently spread it and encourage it to seep into the holes. The liquid will rapidly disappear into the cake. Some may pool on the surface initially.
The Chilled & Set Cake (Result of Refrigeration)
Refrigerate the cake, uncovered, for at least 3-4 hours (or overnight) to allow the filling to fully set and the cake to absorb all the liquid completely. The top will look moist and may have a slight sheen or color from the filling.
The Cake with Topping (Result of Spreading Topping)
Once the cake is completely chilled and set, spread the thawed whipped topping evenly over the entire surface with an offset spatula, creating a smooth, white layer.
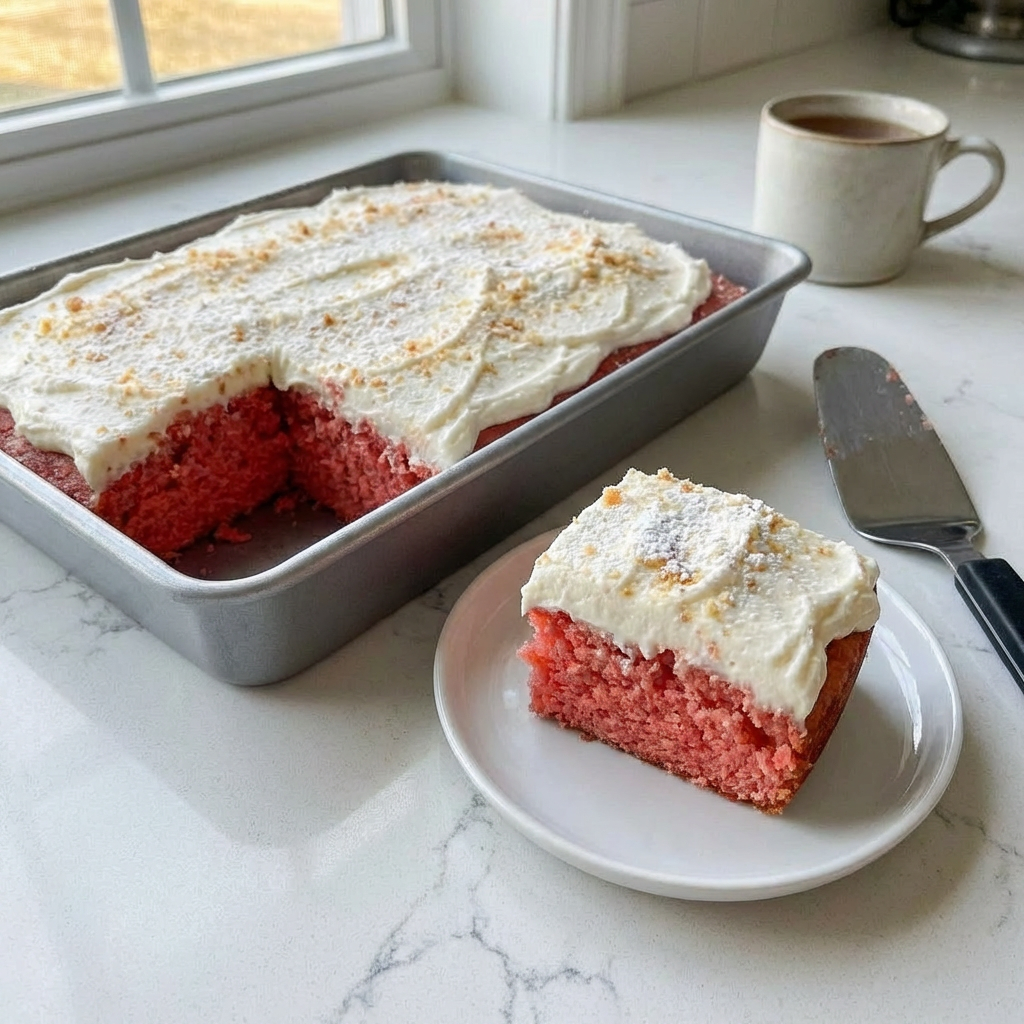
The Decorated Poke Cake (Result of Garnishing)
Add your final garnishes. For a strawberry Jell-O cake: top with sliced strawberries and a drizzle of strawberry sauce. For chocolate pudding: add chocolate shavings. For coconut: sprinkle with toasted coconut.
Serve & Store
Slice and serve cold. Keep leftovers covered in the refrigerator for up to 4 days. The cake gets more moist as it sits.
Pro-Tips for a Perfectly Soaked Poke Cake
- Poke While Warm, Not Hot: If the cake is too hot, it can become mushy. If it’s completely cool, it won’t absorb as well. The 20-minute window is ideal.
- Right-Sized Holes: Use a tool with a diameter of about ¼ to ½-inch. Smaller holes won’t allow enough filling in; larger ones might make the cake fall apart.
- Go Slow When Pouring: Pour the filling in stages, allowing it to soak in before adding more, to ensure even distribution and prevent overflow.
- Chill Thoroughly: This is not an optional step. The chilling time allows the filling to gel or set within the cake, creating its signature texture.
- Customize Your Flavor: Match your cake mix, filling, and toppings. Try chocolate cake with cherry Jell-O and chocolate whipped cream, or lemon cake with lemon pudding and fresh blueberries.
- Make Ahead Friendly: This is the ultimate make-ahead dessert. Assemble it completely a day before your event. The flavors meld and the texture only improves.
Poke cake proves that the most beloved desserts are often the simplest ones to make.