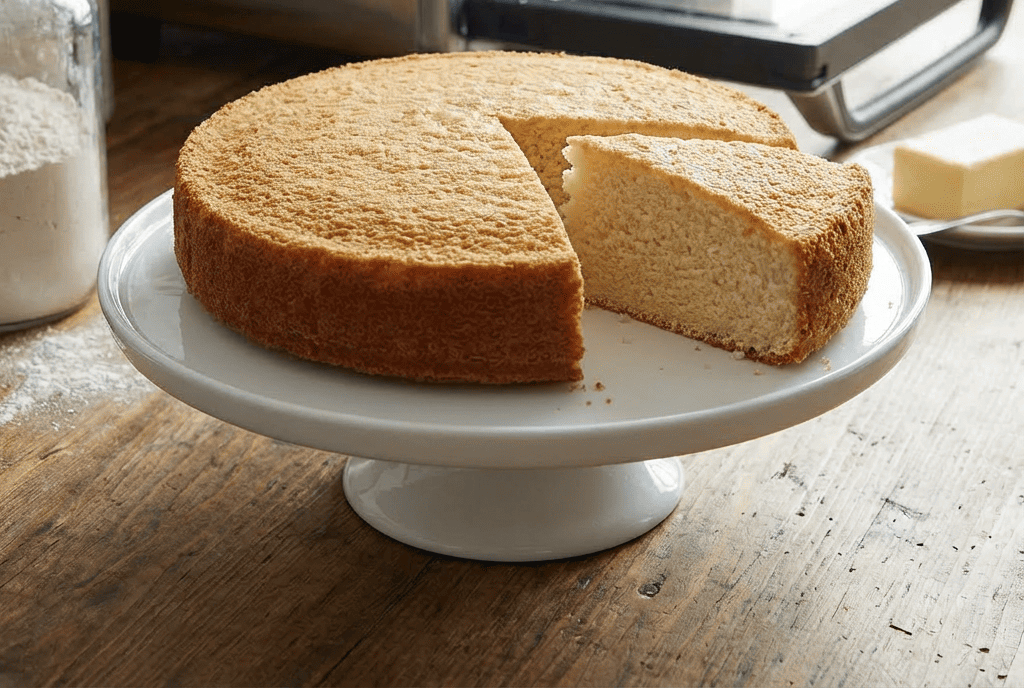
A true sponge cake is a marvel of baking alchemy—transforming eggs, sugar, and flour into a cloud-like structure that is both sturdy and tender. Unlike butter cakes, this classic European cake relies on the power of whipped eggs for its rise, resulting in an exceptionally light, airy, and versatile canvas for your dessert creations.
Whether you’re building a towering layered masterpiece with buttercream, rolling it into a Swiss roll, or simply serving it with fresh fruit and cream, mastering the sponge cake is a fundamental skill. This recipe demystifies the process, guiding you through the crucial techniques of whipping, folding, and baking to achieve a consistently tall, moist, and perfectly structured cake every time.
The Science of a Perfect Rise: Whipped Eggs & Gentle Folding
The entire structure of a sponge cake hinges on the mechanical leavening provided by whipped eggs. When eggs and sugar are whisked vigorously, they incorporate millions of tiny air bubbles. Heating this mixture (over a water bath or with careful whipping) stabilizes the foam by partially cooking the egg proteins, allowing it to hold more air. This creates a stable network that will expand in the oven’s heat, giving the cake its dramatic rise.
The most critical step is folding in the flour. Using a broad, gentle motion with a spatula preserves as much of that precious air as possible. Aggressive stirring would deflate the foam, resulting in a dense cake. This gentle incorporation, along with baking immediately in a preheated oven, ensures the cake sets around those air pockets, creating the signature fine, even, and elastic crumb that can soak up syrups and hold layers without becoming soggy.
Ingredients
For the Classic Sponge Cake:
- 4 large eggs, at room temperature
- ¾ cup (150g) granulated sugar
- 1 teaspoon vanilla extract or ½ teaspoon almond extract (optional)
- 1 cup (125g) cake flour* (or all-purpose flour, see note)
- ¼ teaspoon salt
- 2 tablespoons unsalted butter, melted and cooled (optional, for richer flavor)
- 2 tablespoons milk, warmed (optional, for added moisture)
*Cake flour has less protein than all-purpose, yielding a more tender crumb. If using all-purpose flour, remove 2 tablespoons from the cup and replace with 2 tablespoons of cornstarch.
Instructions

1. Prep: Preheat oven to 350°F (175°C). Do not grease the sides of an 8-inch or 9-inch round cake pan. Line the bottom with parchment paper. (Ungreased sides help the cake climb).
2. Warm & Whip Eggs & Sugar: In the bowl of a stand mixer, combine eggs and sugar. Place the bowl over a pot of simmering water (double boiler), ensuring the bottom doesn’t touch the water. Whisk constantly by hand for 3-5 minutes until the mixture is warm to the touch (about 110°F / 43°C) and the sugar is dissolved.
3. Whip to Ribbon Stage: Immediately transfer the bowl to the stand mixer fitted with the whisk attachment. Whip on medium-high speed for 5-8 minutes until the mixture is very pale, tripled in volume, and falls in thick, slow ribbons when the whisk is lifted. This is the “ribbon stage.” Whisk in vanilla.
4. Incorporate Dry Ingredients: Sift the flour and salt over the egg mixture in two or three additions. Using a large flexible spatula, gently fold the flour into the batter after each addition. Use a broad, scooping motion, rotating the bowl, until just combined and no dry streaks remain.
5. Add Butter/Milk (Optional): If using, combine the cooled melted butter and warm milk. Take a small scoop of the batter and mix it thoroughly with the butter mixture in a separate bowl. Then, gently fold this mixture back into the main batter. This helps incorporate the fat evenly without deflating the batter.
6. Bake Immediately: Pour the batter into the prepared pan. Gently tap the pan on the counter once to release large air bubbles. Bake immediately for 25-30 minutes, or until the top is golden and springs back when lightly touched, and a toothpick inserted into the center comes out clean.

7. Cool Upside Down: Remove the cake from the oven. Immediately run a thin knife around the edges to loosen. Invert the cake onto a wire rack and peel off the parchment paper. Let it cool completely upside down. This prevents it from collapsing under its own weight.
8. Use or Store: Once cool, slice horizontally into layers with a serrated knife. Use as desired. Unfilled sponge cake can be wrapped tightly and stored at room temperature for 2 days or frozen for up to a month.

Pro-Tips for a Flawless, Tall Sponge Every Time
- Room Temperature Eggs are Non-Negotiable: They whip to a much greater volume than cold eggs.
- The Warm-Up is Key: Gently warming the eggs and sugar dissolves the sugar and makes the eggs whip faster and more stable. Don’t skip the double boiler step.
- Don’t Peek: Resist opening the oven door during the first 20 minutes of baking. A sudden drop in temperature can cause the cake to fall.
- Folding Technique: Cut through the center of the batter with your spatula, scoop along the bottom, and fold over the top. Rotate the bowl and repeat. Be patient and gentle.
- Cooling Upside Down: This traditional method uses gravity to keep the cake’s structure stretched and intact as it cools, preventing sinking.
- Flavor Infusions: Brush cooled layers with simple syrup flavored with citrus, liqueur, or coffee. Add lemon or orange zest to the batter.
This Perfect Sponge Cake is more than a recipe—it’s a technique that opens the door to a world of elegant desserts.