Let’s bust a myth right now: you do not need a bamboo mat to make sushi at home. You don’t need any special equipment at all. Just your hands, a sharp knife, and the willingness to get a little rice under your fingernails.
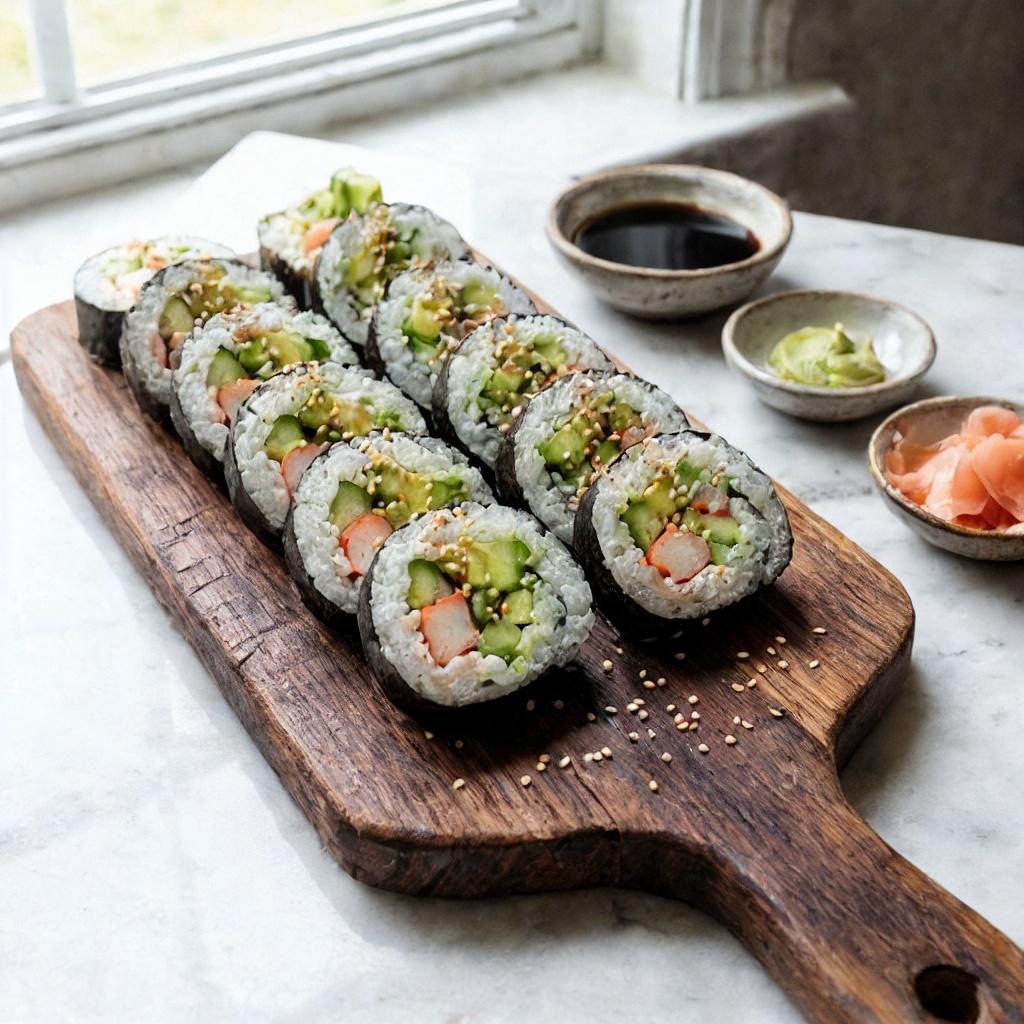
These Homemade Sushi Rolls are proof that restaurant-quality sushi is absolutely achievable in your own kitchen. We’re talking about perfectly seasoned sushi rice, fresh fillings of your choice, and nori that crisps up just right.
Whether you’re a California roll purist or want to load up with avocado, cucumber, and imitation crab, this recipe gives you the technique and confidence to roll like a pro. No mat? No problem.
The Secret to Perfect Sushi Rice (It’s All in the Vinegar)
Sushi rice is the heart of any great roll. It’s not just about cooking the rice—it’s about seasoning it properly. The magic lies in the sushi vinegar: a mixture of rice vinegar, sugar, and salt that’s gently folded into the hot cooked rice.
This gives the rice that signature sweet-tangy flavor and glossy appearance. The other secret? Hand technique. You don’t need a wooden hangiri (sushi barrel) to cool the rice properly. A large baking sheet works beautifully.
Spread the hot rice in a thin layer, drizzle the vinegar mixture over it, and use a slicing-and-folding motion with a spatula to cool it quickly while coating every grain. The goal is glossy, slightly sticky rice that holds together without being mushy. Master the rice, and you’ve mastered sushi.
Instructions
Rinse the Rice
Place the sushi rice in a fine-mesh strainer and rinse under cold water, gently swishing with your hands, until the water runs clear. This removes excess starch and prevents gummy rice. Let it drain for 15-20 minutes .
Cook the Rice
Combine the rinsed rice and 2 ½ cups water in a medium pot with a tight-fitting lid. Bring to a boil over medium-high heat. Reduce heat to low, cover, and simmer for 15 minutes. Remove from heat (keep covered) and let steam for another 10-15 minutes .
Make the Sushi Vinegar
While the rice cooks, combine the rice vinegar, sugar, and salt in a small microwave-safe bowl or small saucepan. Heat for 20-30 seconds in the microwave (or gently over low heat) and stir until the sugar and salt are completely dissolved. Do not boil .
Season the Rice
Transfer the hot cooked rice to a large baking sheet or wide shallow bowl. Spread it out in an even layer. Drizzle the vinegar mixture evenly over the rice. Use a spatula to gently fold and slice through the rice, tossing it to coat every grain.
Fan the rice with a piece of cardboard or a fan as you go to cool it quickly. The rice should become glossy and cool to room temperature. Cover with a damp cloth to keep it from drying out while you prep fillings .
Prep Your Fillings
Cut your cucumber, avocado, and imitation crab into long, thin strips. Having everything ready before you start rolling makes the process smooth and stress-free .
Prep Your Rolling Station
Fill a small bowl with water and a splash of rice vinegar (this prevents sticking). Have your nori sheets, fillings, and a clean cutting board ready. If you want sesame seeds on the outside, spread them on a small plate .
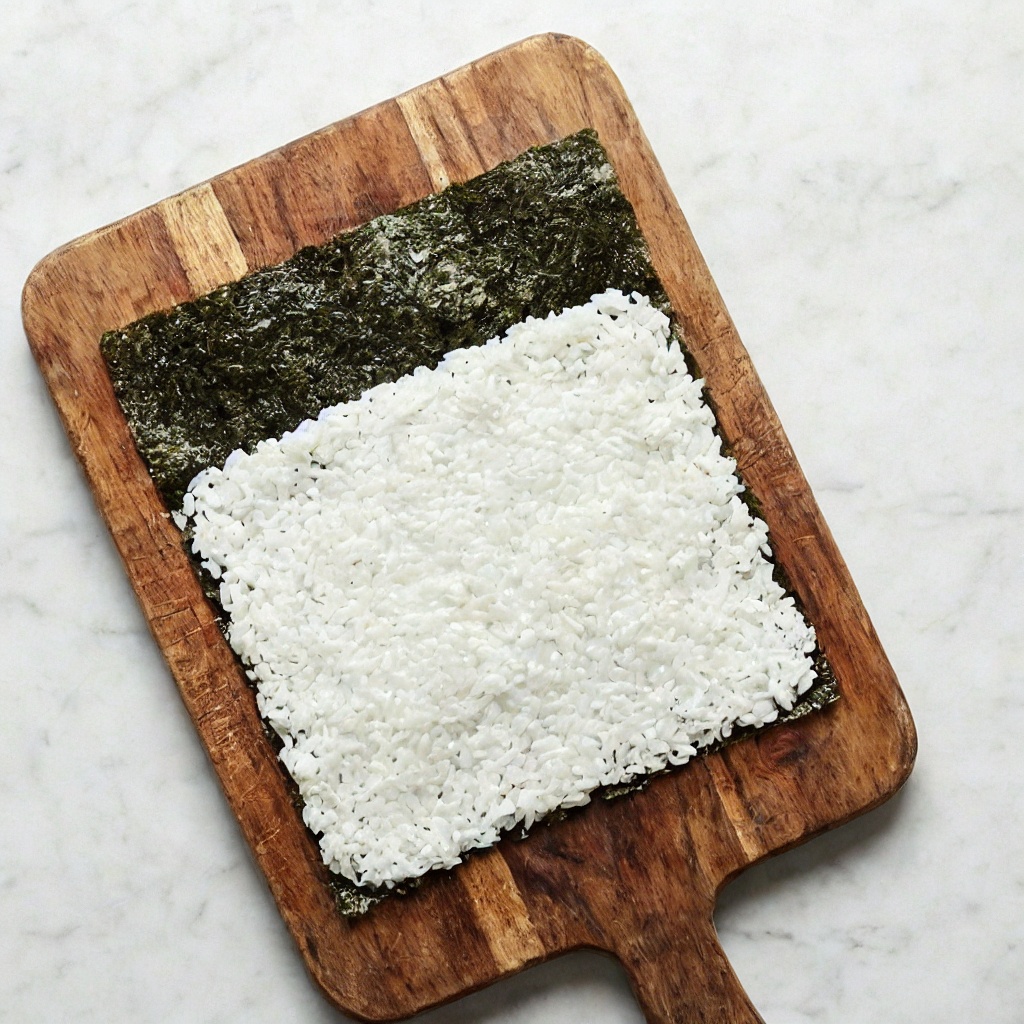
Place the Nori
Take one sheet of nori and place it shiny-side down on a clean, dry cutting board. The rough side should face up—that’s where the rice will stick .
Spread the Rice (The No-Mat Method)
Dip your hands in the vinegar water to prevent sticking. Grab a handful of sushi rice (about ¾ cup) and gently spread it evenly over the nori, leaving a 1-inch strip bare at the top edge. Press the rice down gently but firmly—you want an even, compact layer about ¼-inch thick .
Add Fillings
Arrange your fillings in a line across the center of the rice. Don’t overfill—less is more. A few strips of cucumber, a couple slices of avocado, and a piece of imitation crab is plenty .
Roll (With Your Hands!)
Lift the bottom edge of the nori (the edge closest to you) and fold it over the fillings, tucking it in gently but firmly with your fingers. Press to secure.
Continue rolling away from you, using your fingers to keep the fillings in place and applying even pressure to create a tight, compact roll. When you reach the bare strip at the top, dab it lightly with water to seal. The roll should be firm and round .
Add Sesame Seeds (Optional)
If you want sesame seeds on the outside, gently roll the finished roll in the plate of sesame seeds, pressing lightly so they stick .
Slice the Rolls
Use a very sharp knife. For clean cuts, wipe the knife with a damp cloth between slices. Cut the roll in half, then cut each half into thirds (or quarters for smaller pieces). You should get 6-8 pieces per roll .
Serve Immediately
Arrange the sliced rolls on a platter and serve with soy sauce, wasabi, and pickled ginger. Best eaten the day they’re made .
Pro-Tips for Sushi Success
- Use Short-Grain Sushi Rice: Long-grain rice won’t stick together properly. Sushi rice is non-negotiable for the right texture .
- Keep Your Hands Wet: The vinegar water prevents rice from sticking to your fingers. Dip them frequently as you work .
- Don’t Overfill: It’s tempting to load up the rolls, but too much filling makes them impossible to close and likely to fall apart. Less is more .
- Sharp Knife = Clean Cuts: A dull knife will squish your beautiful rolls. Use a sharp knife and wipe it clean between slices for perfect circles .
- Practice Makes Perfect: Your first roll might be a little lopsided. Your third will be beautiful. Your fifth will look like it came from a restaurant. Keep going .