Let’s clear something up right now: you do not need to be a professional baker to make incredible sourdough bread at home. You don’t need a stand mixer, you don’t need to knead for 20 minutes, and you definitely don’t need to dedicate your life to a starter.
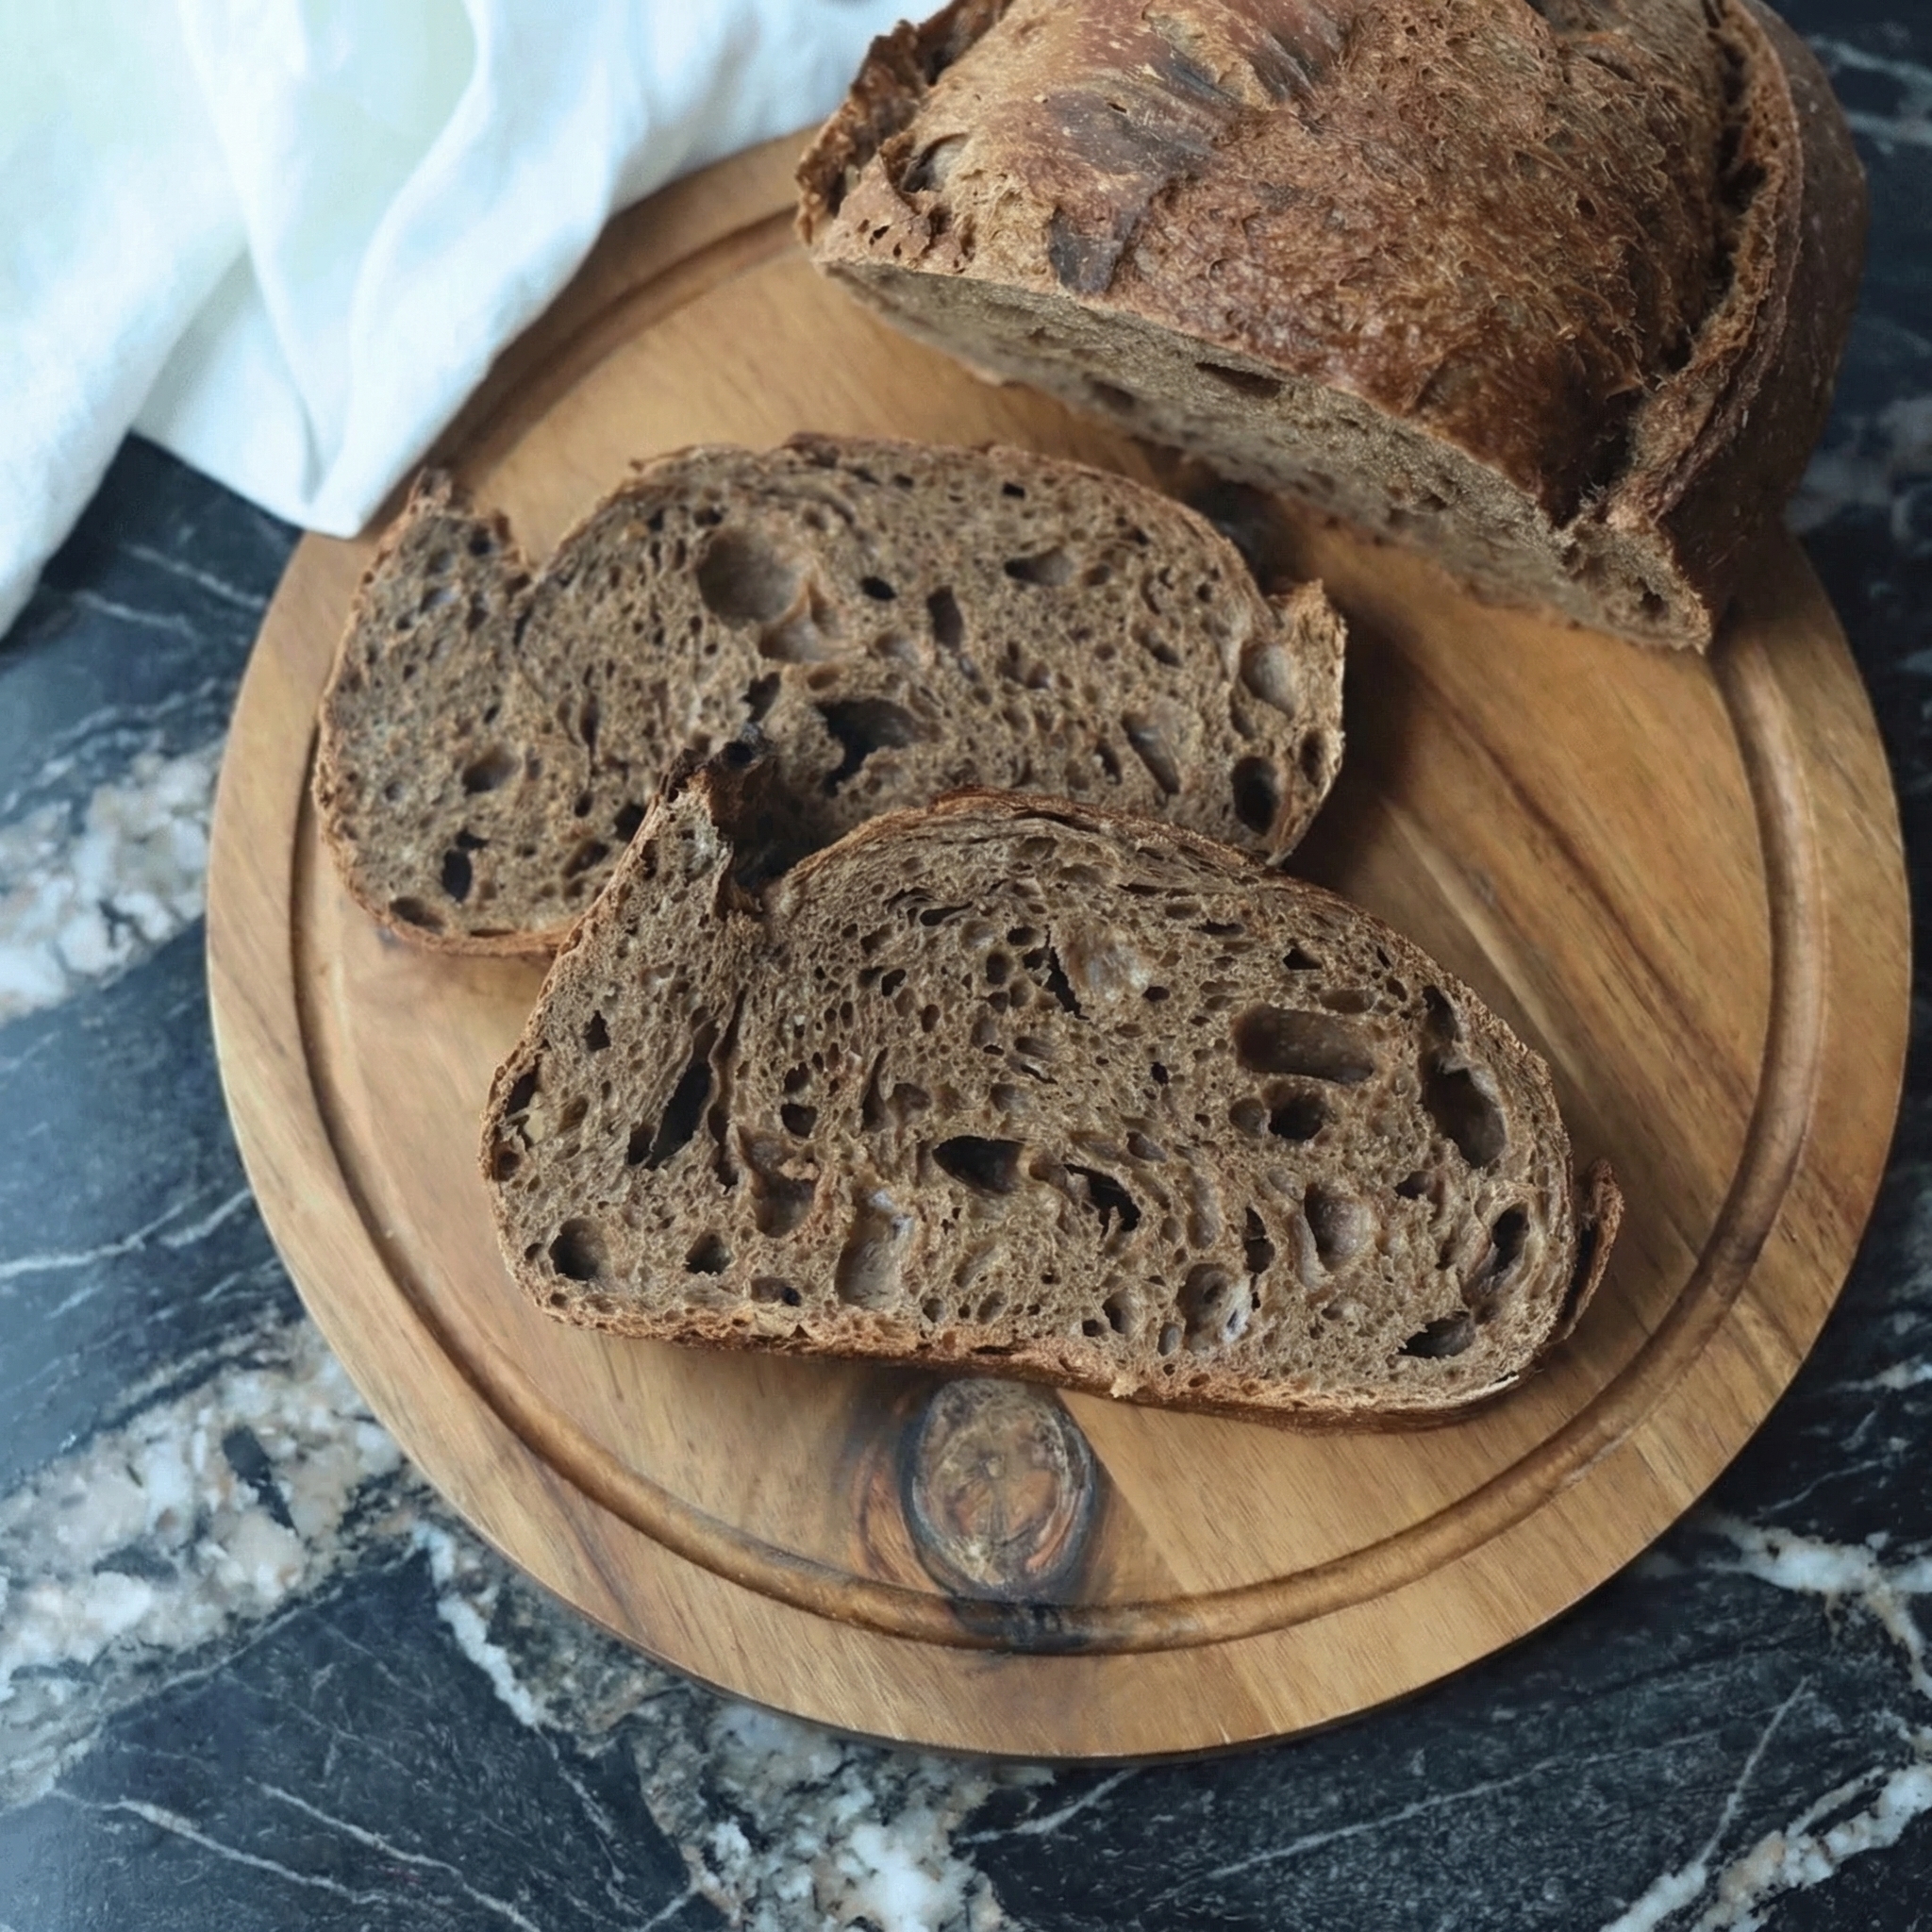
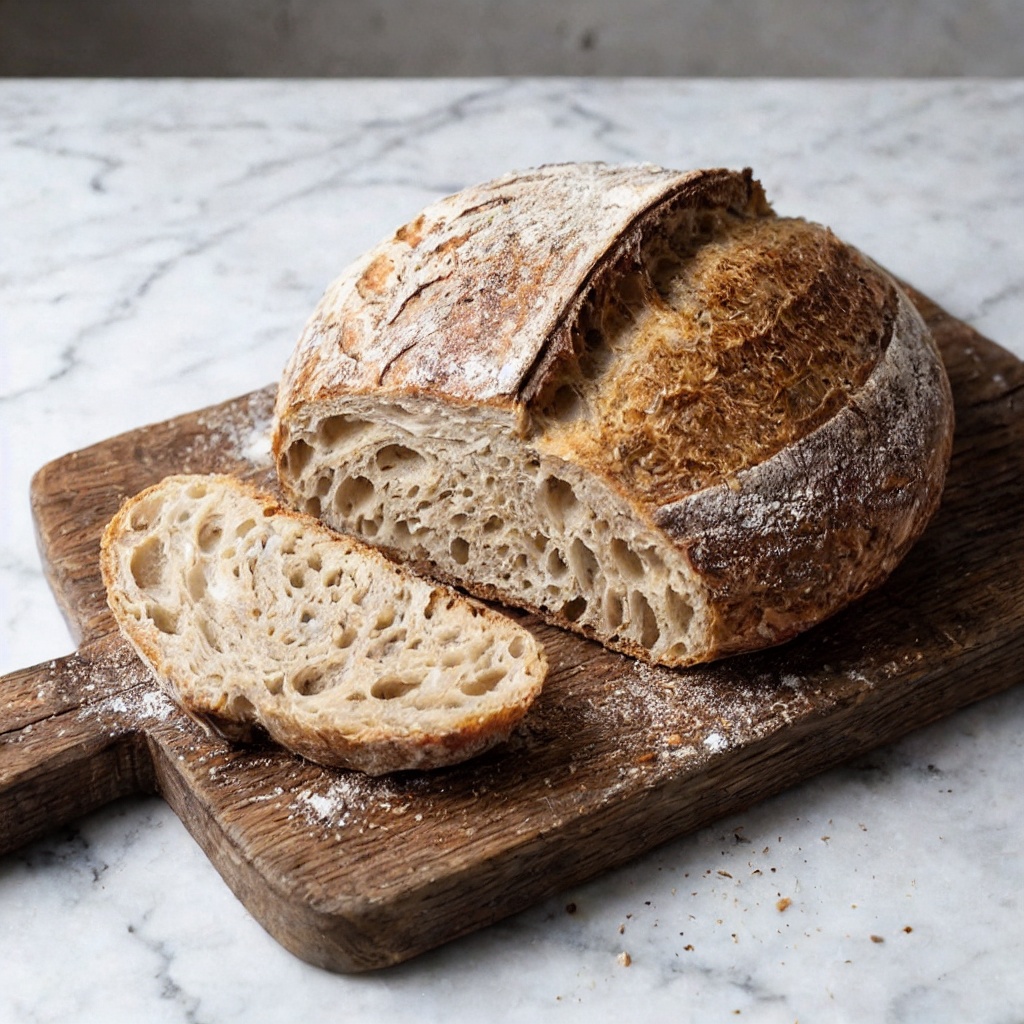
This no-knead sourdough is the proof. With just a little patience, a Dutch oven, and this recipe, you can create a loaf that looks and tastes like it came from a fancy bakery—crackly golden crust, chewy interior with beautiful holes, that signature tangy sourdough flavor. It’s simple, it’s forgiving, and it’s absolutely magical. Let’s bake some bread.
The Secret to No-Knead Success: Time Does the Work
The magic of no-knead bread is simple: time and fermentation. Instead of developing gluten through physical kneading, we let a long, slow rise do the work. Over many hours, the dough naturally strengthens and develops that beautiful, stretchy structure.
The other secret is high hydration—a wetter dough creates those iconic sourdough holes and a chewy, open crumb. And finally, a screaming-hot Dutch oven traps steam and creates the perfect environment for a crackly, golden crust. Patience and heat—that’s the whole trick. You’ve got this.
Instructions
Feed Your Starter
Make sure your sourdough starter is active and bubbly. Feed it 4-8 hours before you plan to mix your dough, or use it at its peak when it’s doubled and full of bubbles .
Mix the Dough
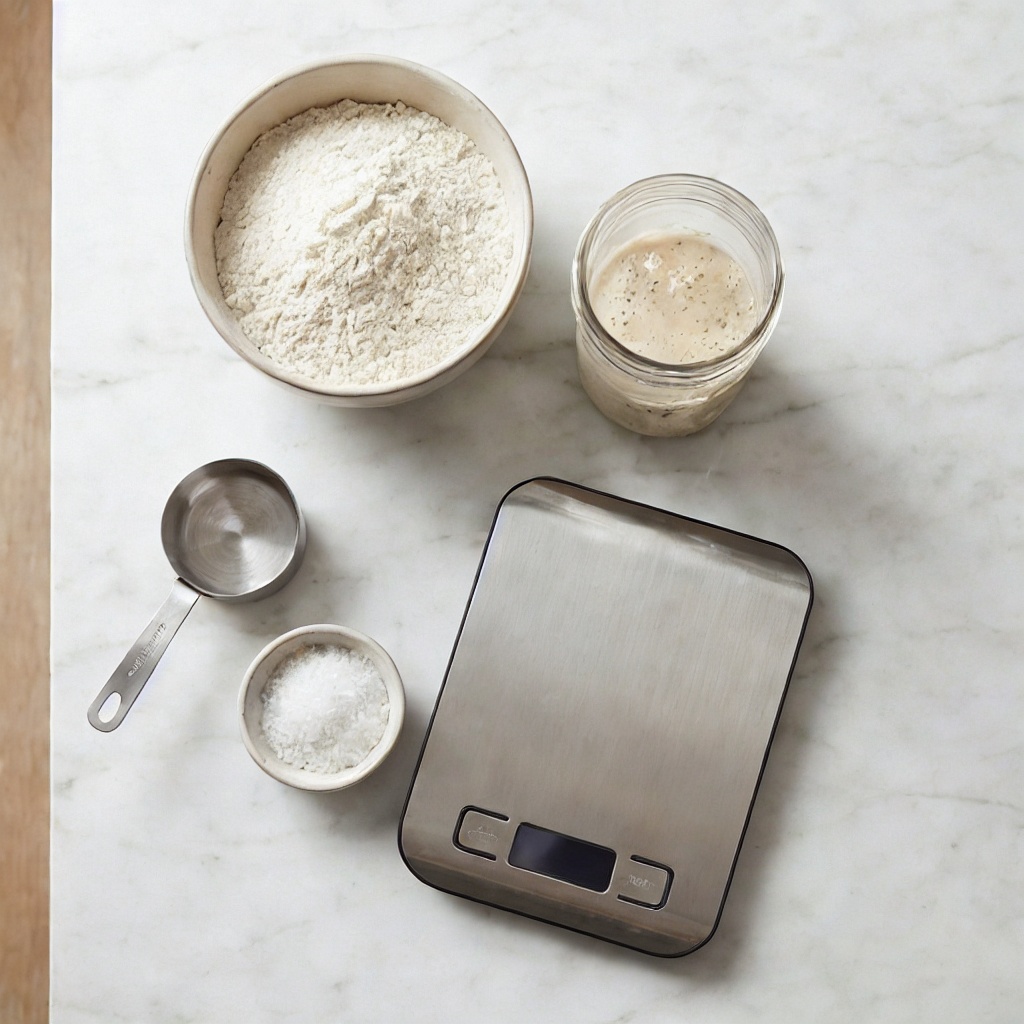
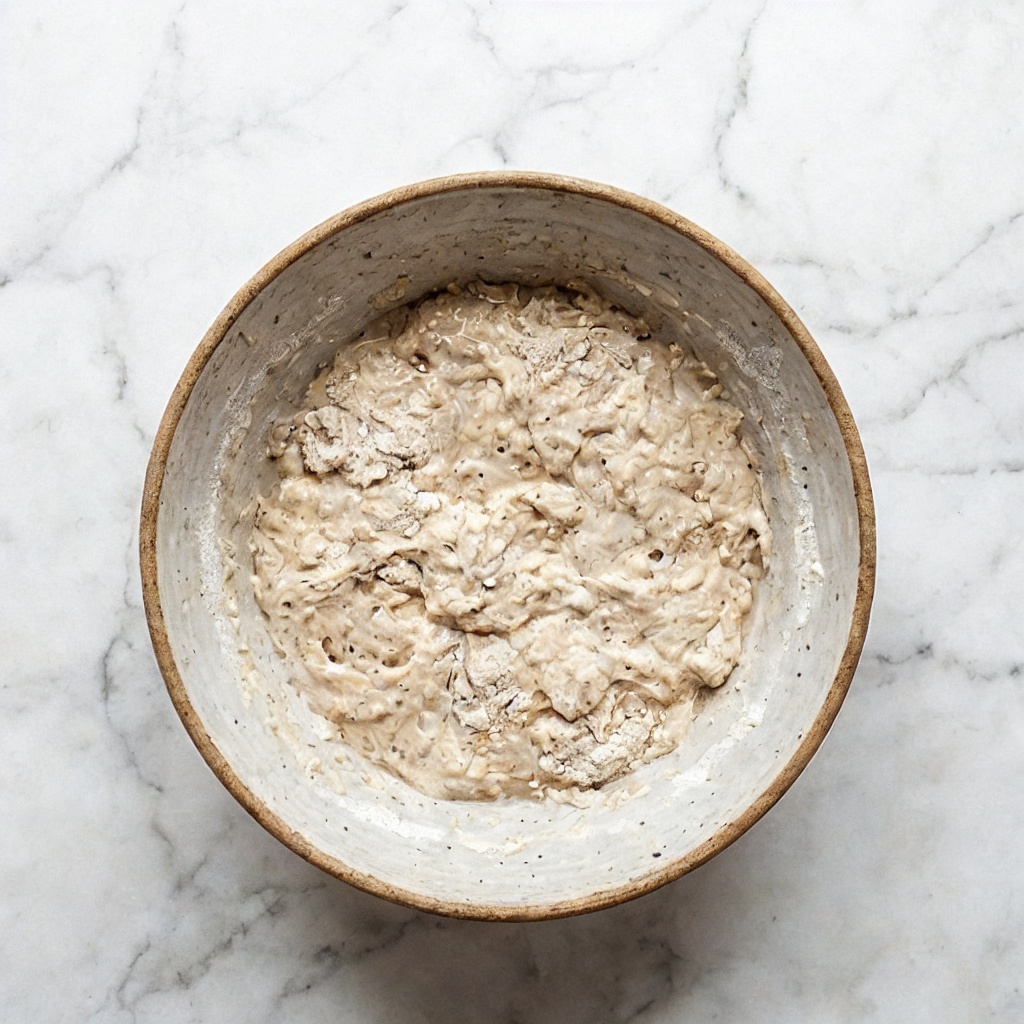
In a large bowl, combine the warm water and active sourdough starter. Stir with a wooden spoon or your hand until the starter is mostly dissolved. Add the bread flour, whole wheat flour, and salt. Mix until no dry flour remains. The dough will be shaggy, sticky, and wet—that’s exactly right .
Cover and Rest
Cover the bowl with plastic wrap or a damp kitchen towel. Let it rest at room temperature for 30 minutes. This is called the autolyse—it allows the flour to absorb the water and starts gluten development .
Stretch and Fold (First Set)
With wet hands to prevent sticking, grab one side of the dough, stretch it up, and fold it over the top. Rotate the bowl and repeat 3-4 times until you’ve gone all around. This replaces kneading. Cover and let rest 30 minutes .
Repeat Stretch and Folds
Perform 2-3 more sets of stretch and folds, each 30 minutes apart. After the final set, the dough should feel smoother, stronger, and more elastic .
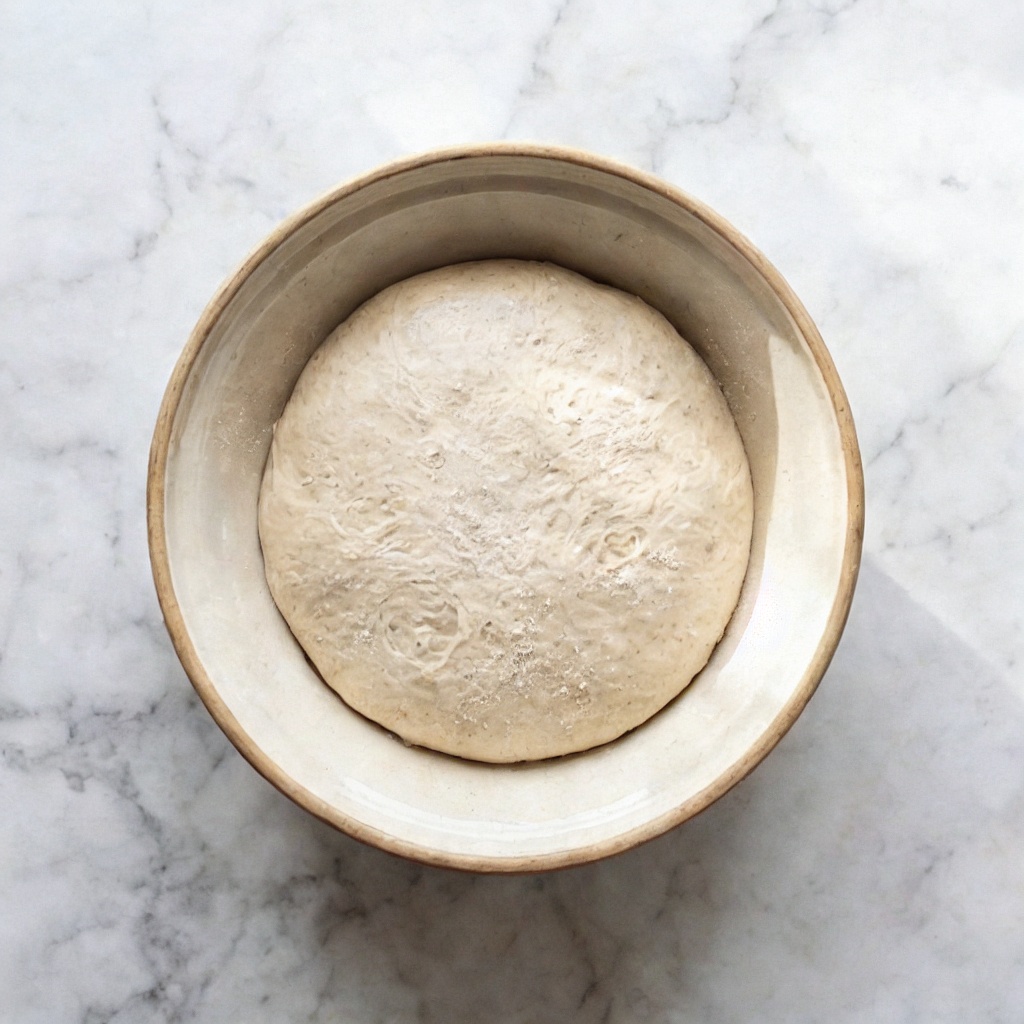
Bulk Fermentation
Cover the bowl and let it rise at room temperature for 6-8 hours (or overnight in a cooler spot). The dough should increase in volume by about 50%, have bubbles on the surface, and smell slightly tangy .
Shape the Dough
Turn the dough out onto a lightly floured surface. Gently shape it into a round by folding the edges into the center. Flip it over and use your hands to create tension by pulling the dough toward you in a circular motion. Let it rest uncovered for 15-20 minutes .
Final Shaping and Proofing
Shape it again into a tighter round. Place it seam-side up in a proofing basket or a bowl lined with a floured kitchen towel. Dust the top with rice flour. Cover and refrigerate for 8-16 hours (overnight is perfect). This cold proof develops flavor and makes scoring easier .
Preheat Dutch Oven
Place a Dutch oven with its lid in the oven and preheat to 500°F (260°C) for at least 30 minutes .
Score the Dough
Carefully turn the cold dough out onto a piece of parchment paper. Dust off excess flour. Using a lame or sharp knife, score the top with a quick, confident slash about ¼-inch deep .
Bake
Carefully place the dough (with parchment) into the hot Dutch oven. Put the lid on and bake at 500°F for 20 minutes. Remove the lid, reduce temperature to 450°F (230°C), and bake for another 20-25 minutes until deeply golden brown .
Cool Completely
Transfer the bread to a wire rack and let it cool completely—at least 1-2 hours. This is the hardest part, but essential for the perfect crumb .
Slice and Enjoy
Slice into that gorgeous loaf and marvel at what you’ve created .
Pro-Tips for Sourdough Greatness
- Use a Kitchen Scale: Baking by weight is far more accurate than cups. A scale is your best friend for consistent results .
- Active Starter is Key: Your starter should be bubbly, doubled, and pass the float test (a spoonful floats in water). If it’s not ready, your bread won’t rise .
- Don’t Skip the Cold Proof: Overnight refrigeration develops flavor and makes scoring infinitely easier .
- Hot Dutch Oven is Essential: A screaming-hot pot creates steam and gives you that gorgeous, crackly crust .
- Cool Completely: Slicing warm bread is tempting, but it will be gummy inside. Patience is rewarded .