Experience the authentic taste of a Sicilian pastry shop with these homemade cannoli. The process is a labor of love, yielding crisp, shatteringly delicious fried shells and a luxuriously smooth, sweet ricotta filling studded with mini chocolate chips.
While making the shells requires a special tool (cannoli tubes), the result is a stunning, impressive dessert that far surpasses any store-bought version. Serve them freshly filled for the ultimate textural contrast.
The Science of a Crisp Shell & A Stable, Creamy Filling
The hallmark of a great cannoli is the contrast between shell and filling. The shell’s crispness comes from a simple dough of flour, wine, and fat that is rolled thin and fried. The alcohol in the wine evaporates quickly during frying, helping to create a blistered, airy texture without making the dough tough.
Frying in hot oil sets the structure almost instantly, creating a sturdy vessel. For the filling, the key is using high-quality, well-drained whole milk ricotta. Excess moisture is the enemy of a creamy, pipeable filling.
Draining the ricotta (or using dry ricotta like ricotta salata) and blending it with confectioners’ sugar creates a stable, sweet cream that won’t make the shell soggy if served promptly.
Instructions
Make, Rest & Roll the Dough
In a food processor, pulse flour, sugar, and salt. Add cold butter and pulse until sandy. With the motor running, slowly add chilled wine until dough just comes together.
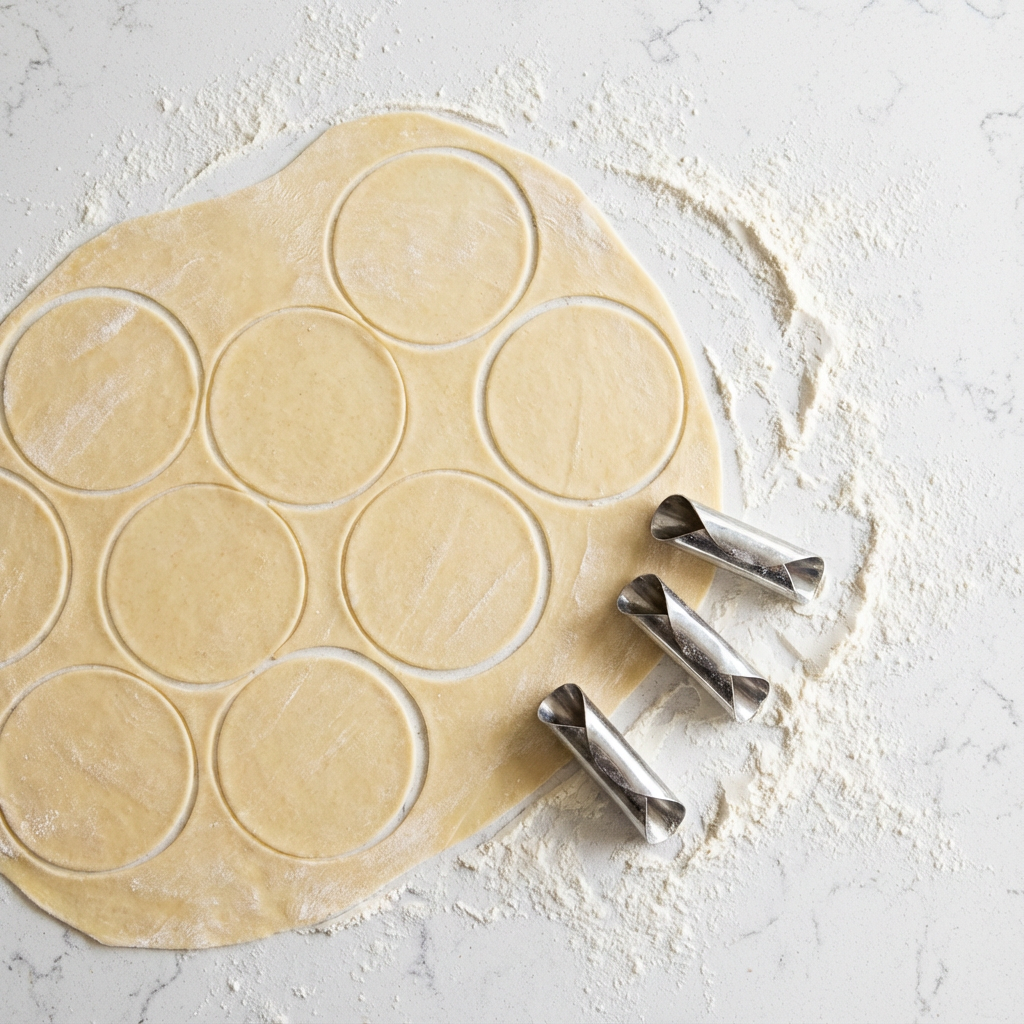
Turn out, knead briefly, shape into a disc, wrap, and refrigerate for 1 hour. Divide dough in half. On a floured surface, roll each half as thin as possible (about 1/16-inch thick). Use a 4-inch round cutter to cut circles. Re-roll scraps.
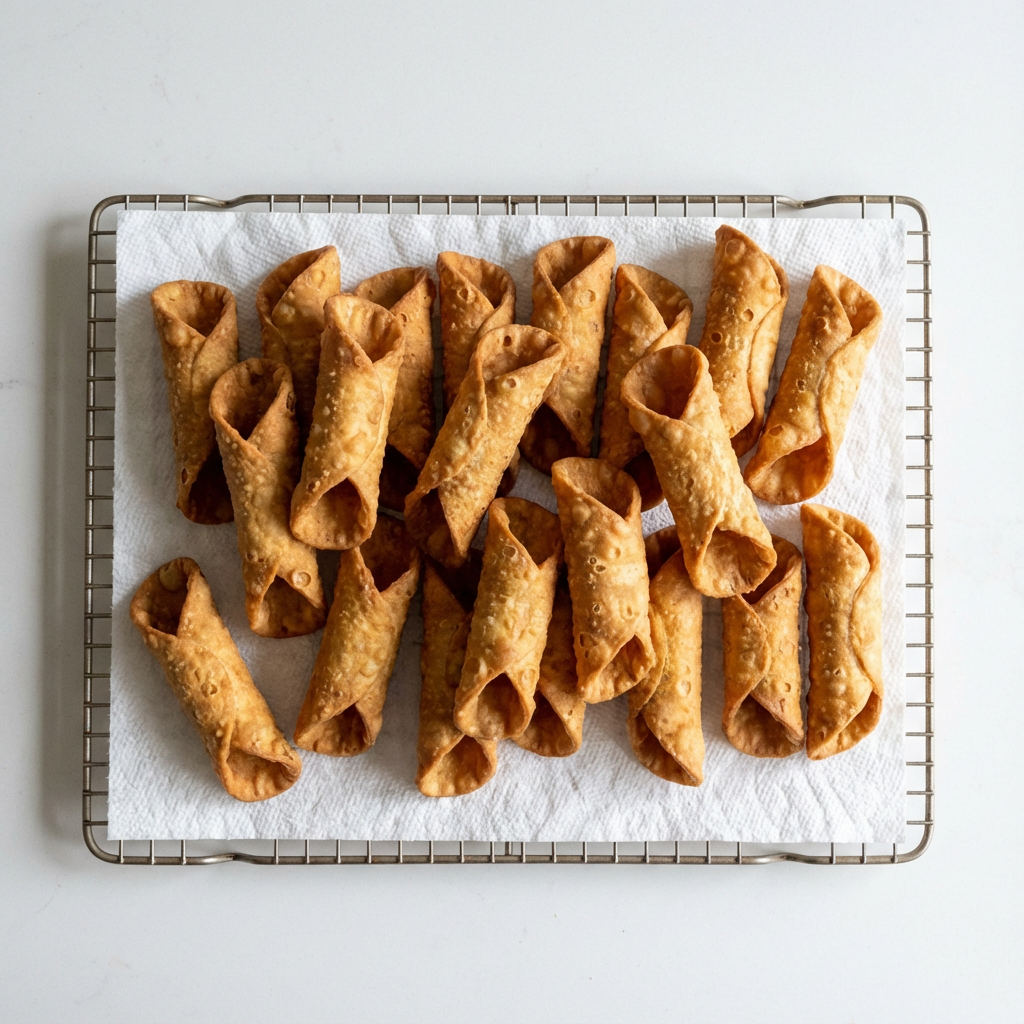
Form & Fry the Shells
Heat 2-3 inches of oil in a heavy pot to 365°F – 375°F (185°C – 190°C). Lightly brush the edge of a dough circle with egg white. Wrap it around a cannoli tube, overlapping slightly, and press to seal. Carefully lower 2-3 tubes at a time into the hot oil. Fry for 1.5-2 minutes, turning until golden brown.
Using tongs, remove and drain on a paper-towel-lined rack. Let cool for 30 seconds, then gently twist and slide the shell off the tube. Let tubes cool completely before reusing.
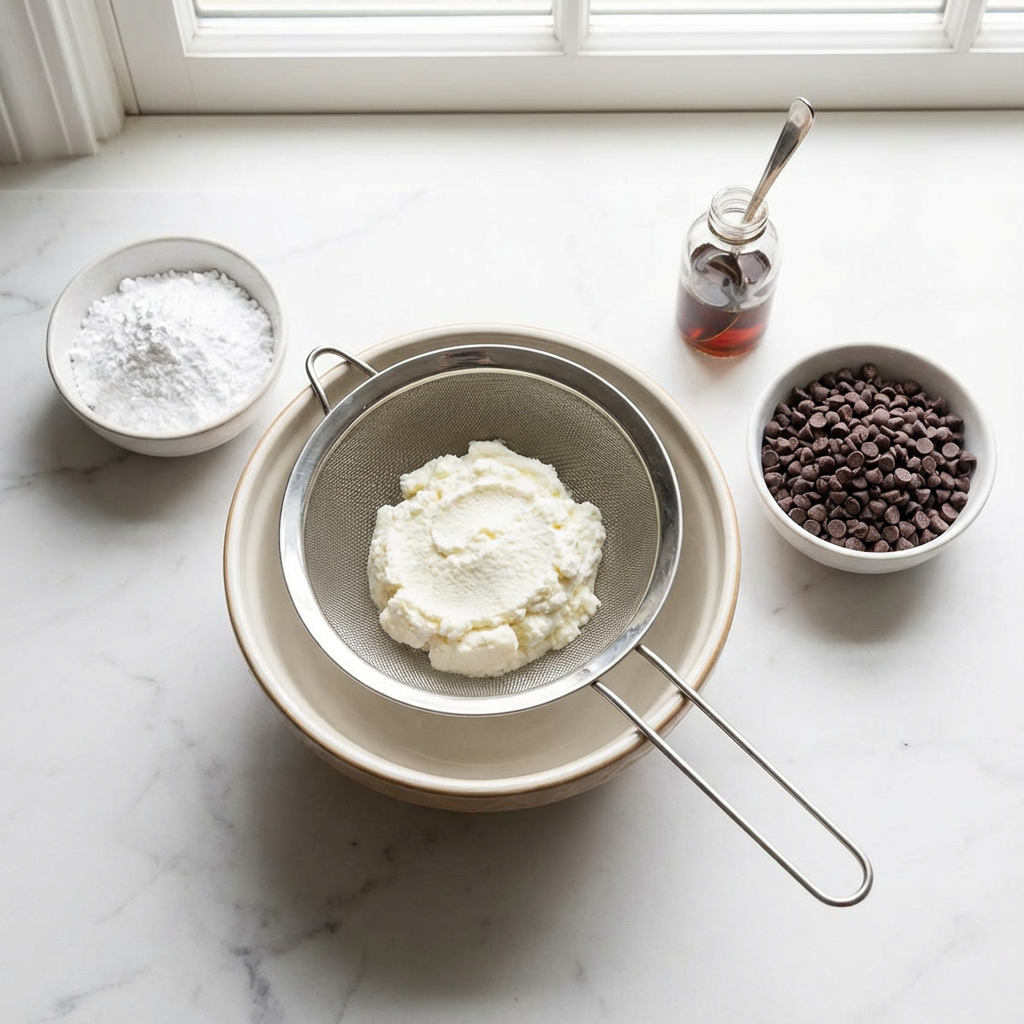
Drain & Prepare the Ricotta Filling
While shells cool, prepare the filling. If your ricotta is wet, place it in a fine-mesh sieve lined with cheesecloth over a bowl and drain in the fridge for 1-2 hours.
In a large bowl, beat the drained ricotta, confectioners’ sugar, vanilla, cinnamon (if using), and salt until smooth and creamy. Gently fold in the mini chocolate chips. Cover and refrigerate until ready to use.
Fill the Cannoli
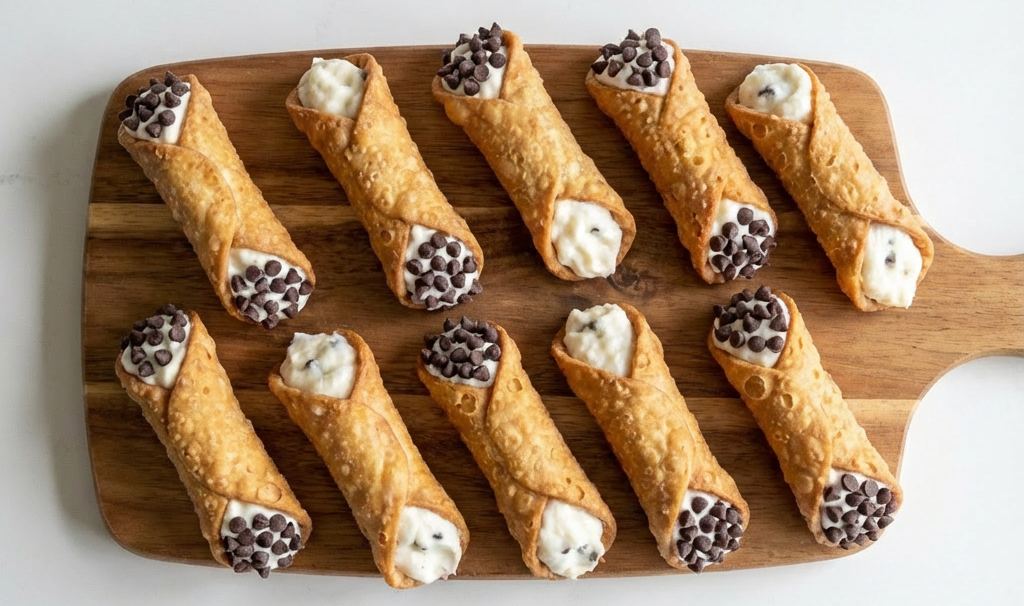
Just before serving, transfer the filling to a piping bag fitted with a large round tip (or a zip-top bag with a corner snipped). Pipe the filling into a cooled shell from one end until it’s halfway full, then pipe from the other end to fill completely. This prevents air pockets. The filling should bulge out slightly at the openings.
Garnish & Serve Immediately
Dip the exposed filling at each end into a bowl of additional mini chocolate chips or chopped pistachios. Dust the shells generously with confectioners’ sugar using a fine-mesh sieve. Serve immediately for the crispiest shells.
Storage Note
Store unfilled shells in an airtight container at room temperature for up to 2 days. Fill only when ready to serve. Leftover filled cannoli will become soggy within a few hours.
Pro-Tips for Authentic, Perfect Cannoli
- Drain Your Ricotta: This is the most critical step for the filling. For best results, drain overnight in the fridge.
- Roll the Dough Paper-Thin: The thinner the dough, the crispier and more delicate the shell. You should almost be able to see through it.
- Maintain Oil Temperature: Use a thermometer. Oil that’s too cool makes greasy shells; too hot burns them.
- Cool Tubes Completely: Reusing hot tubes will cause the next batch of dough to stick and tear.
- Fill Just Before Serving: The moisture from the filling will soften the shell over time. For a party, set up a filling station.
- No Cannoli Tubes? You can fashion molds from aluminum foil wrapped around a dowel or the handle of a wooden spoon, though metal tubes conduct heat best.
These Classic Homemade Cannoli are a truly special treat worth the effort.